Tutorial | Jailbreak iPhone, iPod Touch, iPad - Part 6 Skip to content

Jailbreak iPhone, iPod Touch, iPad

новости про джейлбрейк iPhone, iPod Touch и iPad

Archive

Category: Tutorial

spirit_jailbreak

The first release of Spirit had a bug that accidently could delete all of your photos from the device that was jailbroken. If you have a backup which you made before jailbreaking your iPhone/iPod Touch/iPad, here is a quick guide how to recover deleted photos.

Read the rest of this entry »
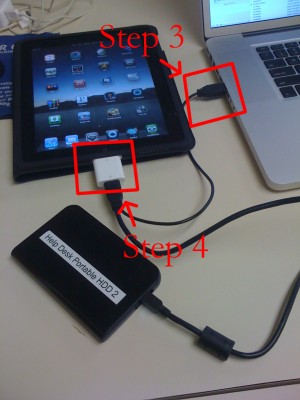
iPad USB Camera Connection Kit is much more useful as it seems. Max Sha, an experienced user, was able to access external hard drive with this kit. All you need is a jailbroken iPad, an external drive, a split-USB cable to give the drive some power and a terminal of some sort (f.e. MacBook) to mount the external storage. While it is a little unwieldy, it shows that Terabytes of external storage for iPad is possible.

Here is a complete step-by-step guide from Max Sha:


Read the rest of this entry »

spirit_jailbreak

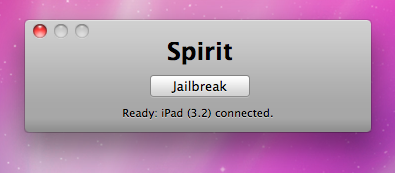
Finally the jailbreak for iPad, iPhone and iPod Touch from the Dev Team is available for download. It’s free and untethered and it’s called “Spirit”. The jailbreak supports every iDevice with firmware version 3.1.2, 3.1.3 or 3.2.


Read the rest of this entry »

MobileTerminalicon

This is quite simple. If you did a jailbreak on your iPhone you need to change the default password. Why? Because hackers can access your phone, read your mail, sms, download other data. The second reason is because there are already several viruses (worms) that use these default passwords.

Here’s a quick step-by-step tutorial.

  1. If you don’t have MobileTerminal application installed: run Cydia, search for MobileTerminal and install.
  2. Run MobileTerminal.
  3. Type passwd and press return.
  4. Enter the default user password alpine and press return.
  5. Enter a new password and press return.
  6. Enter a new password again and press return.
  7. Congratulations, you changed it for default mobile user. Let’s do the same for root user.
  8. Login as root user: type su root and press return.
  9. Type passwd and press return.
  10. Enter the default root user password alpine and press return.
  11. Enter a new password and press return.
  12. Enter a new password again and press return.
  13. That’s it!

The passwords are now changed, and your jailbroken iPhone or iPod Touch is now a bit more secure than it was before and less vulnerable to the worm detected recently.

3.0.1-jailbreak

Good news is that you can still use redsn0w 0.8 to jailbreak firmware 3.0.1. Here’s the step-by-step plan:

  1. Download both firmware 3.0 and firmware 3.0.1 (link).
  2. Download redsn0w 0.8 (link).
  3. Update or restore to official 3.0.1 in iTunes.
  4. Run redsn0w.
  5. When redsn0w asks you to identify the IPSW used, point it at the 3.0 IPSW instead of the 3.0.1 one.
  6. Follow the instructions.
  7. After the jailbreak, reinstall ultrasn0w 0.9 if you need the unlock.

This video tutorial describes how to jailbreak iPhone 3GS using purplera1n.

Dev Team finally made it. They created software called yellowsn0w, that unlocked iPhone 3G. Now you can use any carrier you want. I successfully unlocked my US version.It works much more stable than sim proxy method.

Please, back up everything on your iPhone before you start, just in case. Everything you do is your responsibility. I had to go through all 4 steps to make my iPhone 3G work. I used only my new sim without sim proxy.

Here are the steps:


Read the rest of this entry »

This is a step-by-step tutorial. If you have iPhone 3G this guide will help you jailbreak and activate the device. For iPhone 2G it will also perform the unlock.

I recommend using 2.2 firmware, because iPhone 3G unlock is avaliable now. But you can use it with old v2.1, v2.0.1 and v2.0.2.


Read the rest of this entry »

Run

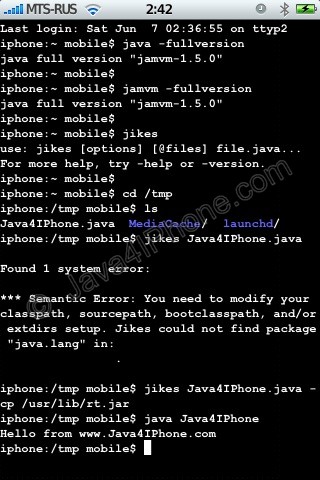
This is a tutorial, that shows step by step how to use installed Java on the IPhone. Just in case you do not have Java installed on your IPhone there is a tutorial how to do it.

What we need is a working jailbraked IPhone with Java Installed. I used latest firmware 1.1.4, unlocked, jailbreaked and customized by winpwn.

Step 1: Create simple Java application, compile and run.


Read the rest of this entry »

Installed packages

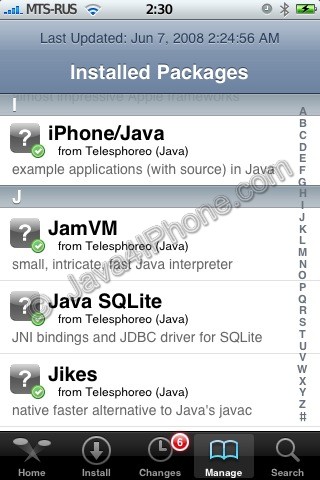
This is a tutorial, that shows step by step how to install Java on the IPhone.

What we need is a working unlocked and jailbraked IPhone with Installer. I used latest firmware 1.1.4, unlocked, jailbreaked and customized by winpwn.

First of all I’d like to say we all want to use legal IPhones and operators. So everything written below is for testing purposes only :-). Hopefully this technology will be avaliable on all IPhones sold worldwide. You also might need to recover your IPhone, so make sure you backed up all your data. I personally did everything without any problems and needs to recover. Everything you do is your responsibility, etc…

So let’s start, because it’s worth it! It’s just one evening and you will be able to create your personal Java application, compile and run it on the IPhone, and amaze all your friends :-).

There are two steps:


Read the rest of this entry »