Cydia | Jailbreak iPhone, iPod Touch, iPad - Part 25 Skip to content

Jailbreak iPhone, iPod Touch, iPad

новости про джейлбрейк iPhone, iPod Touch и iPad

Archive

Category: Cydia

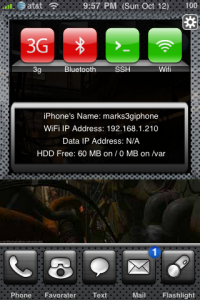
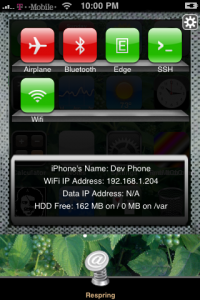
Many users of jailbreaked iPhones use application called BossPrefs. The developer of this app is creating a new one. The new application will be called SBSettings.

The toggles drop down when you swipe along the status bar. It is very fast and can be used while in any app without exiting the app. Suppose you are in Safari but realize your 3g is not yet enabled. Just swipe the statusbar and toggle 3g, than resume in Safari where you left off. The advantage is there is no need to exit Safari and load settings or bossprefs.

The look and feel of this new app will be something like this:

sbsettings01 200x300 The future of BossPrefs sbsettings02 200x300 The future of BossPrefs

via thebigboss
swirlymms icon SwirlyMMS updated to 1.2.8

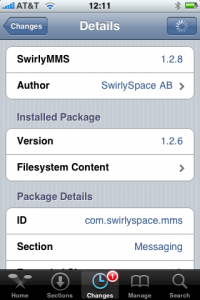
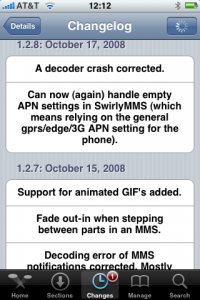
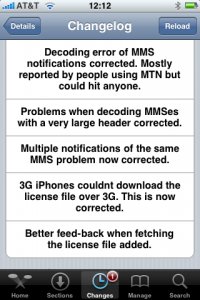
SwirlyMMS is updated to v1.2.8. Many bugs are fixed.

Avaliable in Cydia for jailbreaked iPhones.

img 0002 200x300 SwirlyMMS updated to 1.2.8 img 0004 200x300 SwirlyMMS updated to 1.2.8 img 0005 200x300 SwirlyMMS updated to 1.2.8

unlock 300x277 Tutorial: How to perform Jailbreak, Activation and Unlock (Windows)

This is a step-by-step tutorial. If you have iPhone 3G this guide will help you jailbreak and activate the device. For iPhone 2G it will also perform the unlock.

I recommend using 2.2 firmware, because iPhone 3G unlock is avaliable now. But you can use it with old v2.1, v2.0.1 and v2.0.2.

1. If you’re using old firmware and want to upgrade, please, do it via iTunes.

2. Go ahead and download QuickPwn 2.2 (download links).

3. Download firmware (download links).

4. Close iTunes (if opened) and start QuickPwn. You will see the following:

s1 Tutorial: How to perform Jailbreak, Activation and Unlock (Windows)

5. Connect you iPhone or iPhone 3G and push next button.

s2 Tutorial: How to perform Jailbreak, Activation and Unlock (Windows)

6. Your deveice is detected. Click browse to select firmware image.

s3 Tutorial: How to perform Jailbreak, Activation and Unlock (Windows)

7. Select the image that you downloaded in step 3. Make sure this is the same version that you currently have on your iPhone. If you want to upgrade go to step 1.

s4 Tutorial: How to perform Jailbreak, Activation and Unlock (Windows)

8. The application will verify that you choose the right version of firmware image. Click next.

s5 Tutorial: How to perform Jailbreak, Activation and Unlock (Windows)

9. You will be frequently using Cyda, so make sure to check it. Installer is in beta, but it will be updated in the future, so check this one too. Click next.

s6 Tutorial: How to perform Jailbreak, Activation and Unlock (Windows)

10. Check if your device is connected and hit next.

s7 Tutorial: How to perform Jailbreak, Activation and Unlock (Windows)

11. This is probably the hardest part. You will need to press Home and Power buttons on your iPhone in the special order. So make sure you read instructions carefully and follow them. If not, not big deal, you’ll be able to start from step 4.

There are 3 steps here: hold down Home button for 5 sec, than hold Home and Power button for 10 sec, than hold Home butting for 30 sec.

s8 Tutorial: How to perform Jailbreak, Activation and Unlock (Windows)

12. Than you’ll have to wait whilce QuickPwn will do the work.

s9 Tutorial: How to perform Jailbreak, Activation and Unlock (Windows)

13. Congratulations! You did it. Now you can run Cydia Installer and install usefull and free applications.

pdanet icon PdaNet updated to 1.33

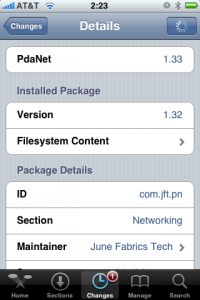
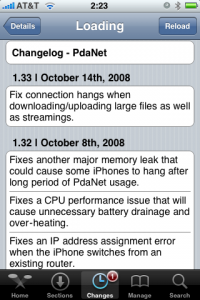
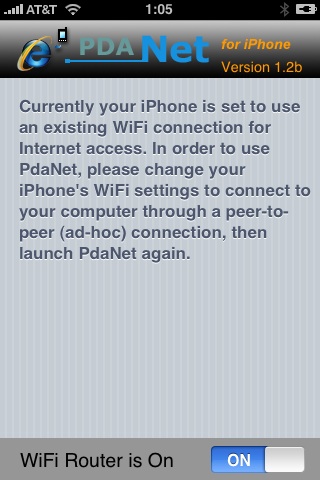
PdaNet updated to version 1.33. This tool allows you to connect any desktop or notebook to internet through iPhone 3G. Here is a changelog:

img 0082 200x300 PdaNet updated to 1.33 img 0083 200x300 PdaNet updated to 1.33

This application is avaliable via Cydia Installer for jailbreaked iPhones.

cydia icon The number of Cydia packages hits 400

Today the 400th package was added to Cydia 2.0 repository today. This number includes all kind of applications, modding themes, sound packages, winterboard themes, etc. Most of this stuff is free. All you need to use this is to jailbreak your iPhone.

Many iPhone 3G users would like to use internet on a desktop or notebook through their phone. There were several solutions: iPhoneModem, NetShare, 3Proxy.. they all used SSH and SOCKS proxy. One of the working ones was described here get internet on a desktop or notebook through IPhone 3G.

Couple days ago PdaNet (fullname is PdaNet WiFi Router) was ported to iPhone. Now our life is much much easier.

pdanet Connect desktop or notebook to internet through iPhone 3G

What you need is a jailbreaked iPhone with Cydia installer. Then install PdaNet.

All you need to do is simply to create an ad-hoc WiFi network on the computer and connect your iPhone to it (instructions). Your computer then goes online automatically. There is no need to specify IP (or any other) settings on either end.

Some nice features:

  • You will get FULL Internet access on the computer! (Instead of only applications that support Socks proxy.) In technical terms, all applications make direct TCP/IP connections to the server. Since there is no proxy involved, that also means less problems and less delays.
  • You don’t need to configure anything on the computer end whenever you connect PdaNet. No proxy settings, no extra software installation, no messing with static IP assignment, no switching settings back and forth when going back to your home’s WiFi router.
  • Yes it will connect at 3G speed if your phone has the coverage.
  • Supports PC, MAC, Linux or anything (include other PDA/phones) that connects to a WiFi router.
  • PdaNet runs in the background so you can still use other iPhone features when PdaNet is connected. But when you are done with them, go back to PdaNet to prevent the phone from entering idle and drops your connection.
  • To turn off the phone screen when using PdaNet, just cover the upper part of the phone (or simply flip the phone upside down). This will conserve your battery.
  • It is recommended that you charge the phone at the same time while using PdaNet, because both WiFi and 3G will be put on full speed, both consume a lot of juice.

One last note: over-usage of PdaNet’s tethering is likely to draw the eye and the ire of AT&T (if you use this provider), so use with care!

I was amazed that very few people know how to turn auto-correction off. Here is what you need:

  • Jailbreak your iPhone and install Cydia
  • Install BossPrefs
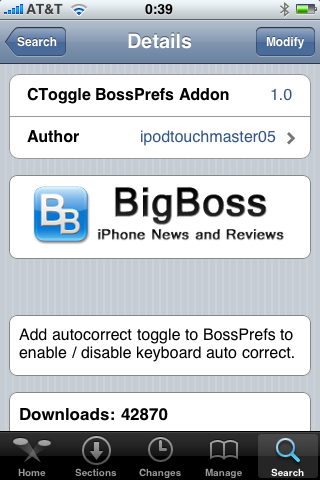
  • Install CToggle BossPrefs Addon
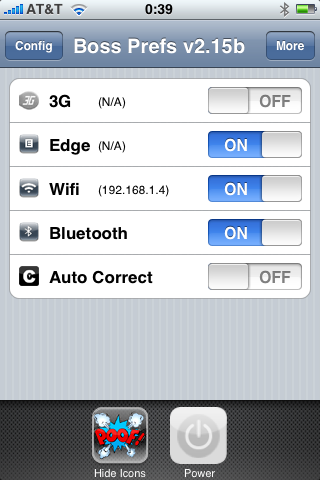
  • Run BossPrefs and turn auto-correction off

autocorrection Auto correction   solution to turn it off autocorrection2 Auto correction   solution to turn it off

There is even a domain: http://please-let-us-disable-autocorrection-steve.com.. Nice.

iphone 3g tethering Get internet on a desktop or notebook through IPhone 3G

Thanks to Dev Team and the porting work of Jay Freeman as well as the authors of 3Proxy, it is now possible to “tether” your iPhone 3G and use its Internet connection on your laptop.

Warning – Tethering your iPhone is against the iPhone data plan terms. AT&T could slap you with huge fees if you overuse this. I recommend only using it during emergencies.

Here is a basic plan (by the way, this should work for old IPhone also):

  • Jailbreak your iPhone 3G
  • Install 3Proxy and Terminal
  • Create an ad-hoc Wi-fi network using your laptop
  • Join the network with your iPhone
  • Find the iPhone’s IP address
  • Open Terminal and run the proxy program
  • Open Safari on your iPhone and open a web page
  • Configure your browser to use the proxy

Later we’ll discuss it with more details.

Step 1: Jailbreak your iPhone

Just download PWNageTool 2.0. Run it and follow the instructions. Make sure to add Cydia, when asked.

Step 2: Install 3Proxy and Terminal

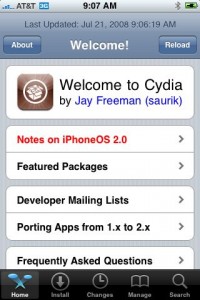
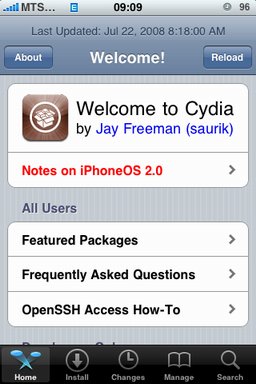
During the jailbreak, Cydia should have appeared on one of your app pages: use it and let Cydia load and self-update.

creationsnet 3428 200x300 Get internet on a desktop or notebook through IPhone 3G

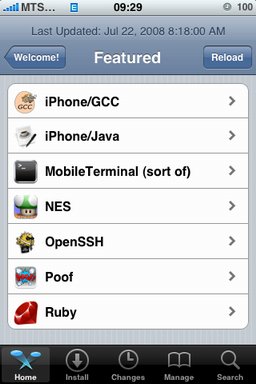
Then head to Install, All Packages, then find MobileTerminal and 3Proxy (3Proxy is at the bottom). Install both and hit your Home button. Your phone will restart and you’ll see Terminal installed on your home screen. 3Proxy isn’t a GUI app and as such won’t have an icon.

Step 3: Create an ad-hoc Wifi network using your laptop

Using whatever wireless software suite you have, create an ad-hoc network. On a Mac it’s in the Airport menu, under “Create network…”. Name it something inconspicuous. I called mine “baladoux”. On your iPhone, join the ad-hoc network.

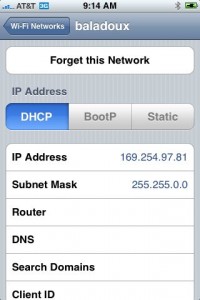
Step 4: Find your iPhone’s IP address

Then, hit the blue arrow next to it, and wait for your IP address to show up:

creationsnet 3430 200x300 Get internet on a desktop or notebook through IPhone 3G

Memorize (or write down) this IP address. You will need it later.

Step 5: Open Terminal and run the proxy program

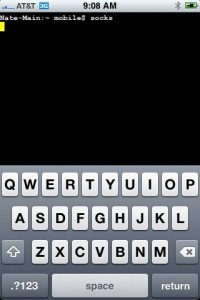
Simple enough. Open Terminal, type “socks” and hit return.

creationsnet 3431 200x300 Get internet on a desktop or notebook through IPhone 3G

Nothing will appear to happen, but the SOCKS server will be running. You can hit the home button to push Terminal to the background (remember to terminate it later, by switching back to Terminal and holding the Home button until it closes).

Step 6: Open Safari on the iPhone and open a web page

Any page will do. I recommend http://jailbreak-iphone.ru

This step is important. The page will take a while to load. When Safari realizes it can’t get to the Internet using the ad-hoc Wifi, it will do some internal magic to switch back to 3G for Internet while still on your ad-hoc network. That lets the proxy do its thing.

Step 7: Configure your browser

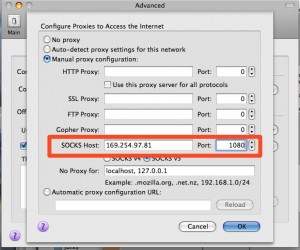
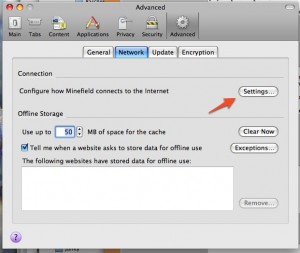
In Firefox, head to Preferences, and under Advanced, Network, hit Settings:

creationsnet 3433 300x253 Get internet on a desktop or notebook through IPhone 3G

Then, fill in the iPhone’s IP address (which you memorized earlier) into the SOCKS Host field, and put 1080 as the port number. Make sure all other proxy fields are blank and/or 0 as shown:

creationsnet 3434 300x250 Get internet on a desktop or notebook through IPhone 3G

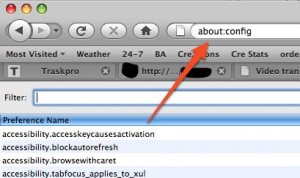
Then, since the proxy doesn’t forward DNS, you will also have to change an advanced option in Firefox. In the Firefox URL bar, enter “about:config” and hit Enter

creationsnet 3435 300x178 Get internet on a desktop or notebook through IPhone 3G

In Filter, type “socks” and then double-click “network.proxy.socks_remote_dns” to make its value “true”.

That should be all you need! Firefox should be able to browse the Internet through your iPhone’s 3G connection.

Tethering costs a lot of battery life on the iPhone so make sure you have it plugged in. When you’re done, make sure to quit Terminal by opening it back up and pressing and holding the Home button until it quits.

Thanks to cre.ations.net for this tutorial.

cydia20 1 Java for IPhone / IPhone 3G firmware 2.0 exists cydia20 2 Java for IPhone / IPhone 3G firmware 2.0 exists

After successfull jailbreake of the IPhone/IPhone 3G with firmware 2.0 it is possible to install Cydia installer. And what is more exciting, there are many applications there, including Java.

Related articles:

screenshots are from iphoneapps.ru