MobileTerminal | Jailbreak iPhone, iPod Touch, iPad Skip to content

Jailbreak iPhone, iPod Touch, iPad

новости про джейлбрейк iPhone, iPod Touch и iPad

Archive

Tag: MobileTerminal

MobileTerminal iPhone4 04 500x333 Step By Step Tutorial: How to install MobileTerminal on iPhone with iOS 4.x

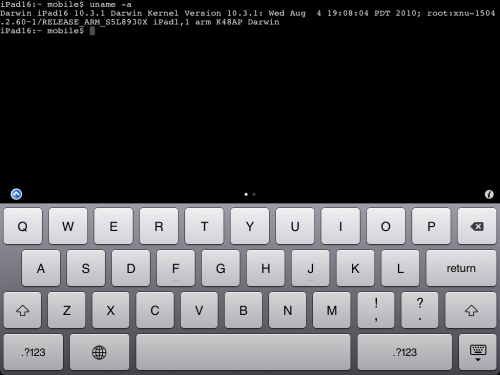
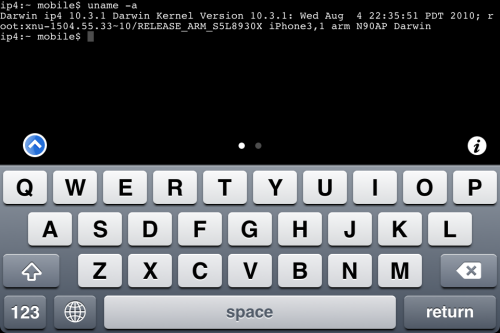
MobileTerminal is a terminal emulator application for the iPad and iPhone. The version of MobileTerminal that is available in Cydia doesn’t work with iPhone iOS 4.x. However there are beta versions that do work, but aren’t on Cydia because they are still in beta stages. This tutorial will show you step-by-step how to install MobileTerminal on iPhone with iOS 4.x (tutorial for iPad is here). If you have old version of MobileTerminal installed – uninstall it in Cydia (Search – MobileTerminal – Remove).

First of all you need to jailbreak your iPhone. If you have not done it already here is an easy tutorial: how to jailbreak iOS 4.0-4.1 on iPhone using Limera1n. After you successfully jailbreaked iPhone:

  1. Run Cydia by tapping on Cydia icon
  2. cydia icon Step By Step Tutorial: How to install MobileTerminal on iPhone with iOS 4.x

  3. The Cydia will start:

Read the rest of this entry

MobileTerminal iPad 05 500x375 Step By Step Tutorial: How to install MobileTerminal on Apple iPad

MobileTerminal is a terminal emulator application for the iPad and iPhone. The version of MobileTerminal that is available in Cydia doesn’t work with iPad iOS 3.2.2 and iPhone iOS 4.x. However there are beta versions that do work, but aren’t on Cydia because they are still in beta stages. This tutorial will show you step-by-step how to install MobileTerminal on iPad (tutorial for iPhone is here). If you have old version of MobileTerminal installed – uninstall it in Cydia (Search – MobileTerminal – Remove).

First of all you need to jailbreak your iPad. Here is an easy tutorial: how to jailbreak iPad with iOS 3.2.2 using Limera1n. After you successfully jailbreaked iPad:

  1. Run Cydia by tapping on Cydia icon
  2. cydia icon Step By Step Tutorial: How to install MobileTerminal on Apple iPad

  3. The Cydia will start:

Read the rest of this entry

ios for ipad

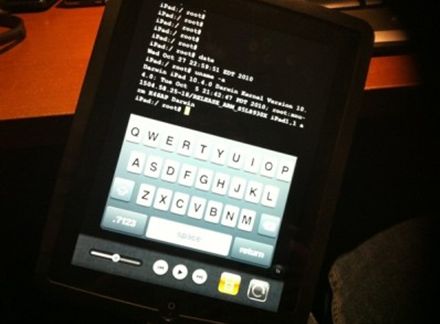
It seams that hackers have had their hands on the iOS 4.2 beta 3 for iPad. But, as we know, there is no official jailbreak for it. Recently the well-known iOS hacker posted aт interesting picture in Tweeter. The shot depicts an iPad running MobileTerminal, a jailbreak application, which gives users full access to the terminal command line interface. But it looks strange, because it means that the hackers missed the beta 4, which should be released this past Tuesday, according to the Apple’s schedule. This could signal that Apple may skip beta 4 altogether and go straight to a GM build sometime next week.

A few hours ago iH8sn0w posted a tweet that he is able to run jailbreak on the new firmware 4.0 beta 1. DarkMalloc, another developer who worked on the project, has just released new video that shows firmware 4.0 jailbreak on iPhone 3G:

The interesting thing, besides the presence of Cydia and MobileTerminal, is the possibility to have multiple applications open at once. That means that multitasking on iPhone 3G can be enabled. Officially Apple doesn’t want to activate this functionality on iPhone 3G, just iPhone 3GS and later devices.

MobileTerminalicon Secure your jailbroken iPhone against worm and hacker attacks

This is quite simple. If you did a jailbreak on your iPhone you need to change the default password. Why? Because hackers can access your phone, read your mail, sms, download other data. The second reason is because there are already several viruses (worms) that use these default passwords.

Here’s a quick step-by-step tutorial.

  1. If you don’t have MobileTerminal application installed: run Cydia, search for MobileTerminal and install.
  2. Run MobileTerminal.
  3. Type passwd and press return.
  4. Enter the default user password alpine and press return.
  5. Enter a new password and press return.
  6. Enter a new password again and press return.
  7. Congratulations, you changed it for default mobile user. Let’s do the same for root user.
  8. Login as root user: type su root and press return.
  9. Type passwd and press return.
  10. Enter the default root user password alpine and press return.
  11. Enter a new password and press return.
  12. Enter a new password again and press return.
  13. That’s it!

The passwords are now changed, and your jailbroken iPhone or iPod Touch is now a bit more secure than it was before and less vulnerable to the worm detected recently.

iphone 3g tethering Get internet on a desktop or notebook through IPhone 3G

Thanks to Dev Team and the porting work of Jay Freeman as well as the authors of 3Proxy, it is now possible to “tether” your iPhone 3G and use its Internet connection on your laptop.

Warning – Tethering your iPhone is against the iPhone data plan terms. AT&T could slap you with huge fees if you overuse this. I recommend only using it during emergencies.

Here is a basic plan (by the way, this should work for old IPhone also):

  • Jailbreak your iPhone 3G
  • Install 3Proxy and Terminal
  • Create an ad-hoc Wi-fi network using your laptop
  • Join the network with your iPhone
  • Find the iPhone’s IP address
  • Open Terminal and run the proxy program
  • Open Safari on your iPhone and open a web page
  • Configure your browser to use the proxy

Later we’ll discuss it with more details.

Step 1: Jailbreak your iPhone

Just download PWNageTool 2.0. Run it and follow the instructions. Make sure to add Cydia, when asked.

Step 2: Install 3Proxy and Terminal

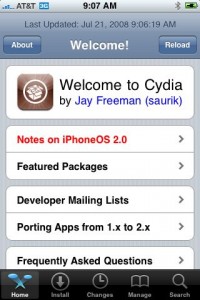
During the jailbreak, Cydia should have appeared on one of your app pages: use it and let Cydia load and self-update.

creationsnet 3428 200x300 Get internet on a desktop or notebook through IPhone 3G

Then head to Install, All Packages, then find MobileTerminal and 3Proxy (3Proxy is at the bottom). Install both and hit your Home button. Your phone will restart and you’ll see Terminal installed on your home screen. 3Proxy isn’t a GUI app and as such won’t have an icon.

Step 3: Create an ad-hoc Wifi network using your laptop

Using whatever wireless software suite you have, create an ad-hoc network. On a Mac it’s in the Airport menu, under “Create network…”. Name it something inconspicuous. I called mine “baladoux”. On your iPhone, join the ad-hoc network.

Step 4: Find your iPhone’s IP address

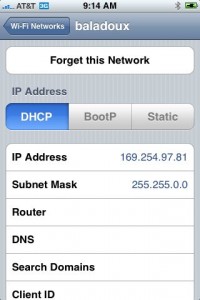
Then, hit the blue arrow next to it, and wait for your IP address to show up:

creationsnet 3430 200x300 Get internet on a desktop or notebook through IPhone 3G

Memorize (or write down) this IP address. You will need it later.

Step 5: Open Terminal and run the proxy program

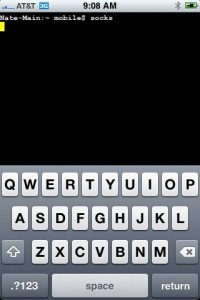
Simple enough. Open Terminal, type “socks” and hit return.

creationsnet 3431 200x300 Get internet on a desktop or notebook through IPhone 3G

Nothing will appear to happen, but the SOCKS server will be running. You can hit the home button to push Terminal to the background (remember to terminate it later, by switching back to Terminal and holding the Home button until it closes).

Step 6: Open Safari on the iPhone and open a web page

Any page will do. I recommend http://jailbreak-iphone.ru

This step is important. The page will take a while to load. When Safari realizes it can’t get to the Internet using the ad-hoc Wifi, it will do some internal magic to switch back to 3G for Internet while still on your ad-hoc network. That lets the proxy do its thing.

Step 7: Configure your browser

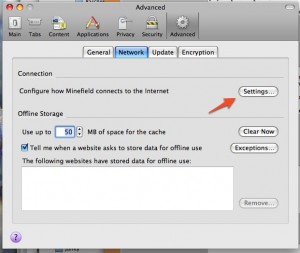
In Firefox, head to Preferences, and under Advanced, Network, hit Settings:

creationsnet 3433 300x253 Get internet on a desktop or notebook through IPhone 3G

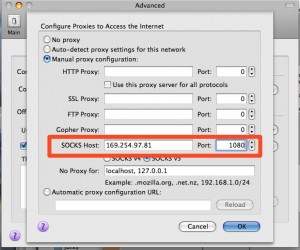
Then, fill in the iPhone’s IP address (which you memorized earlier) into the SOCKS Host field, and put 1080 as the port number. Make sure all other proxy fields are blank and/or 0 as shown:

creationsnet 3434 300x250 Get internet on a desktop or notebook through IPhone 3G

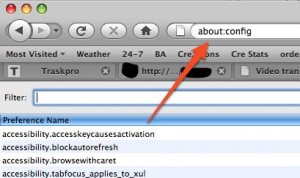
Then, since the proxy doesn’t forward DNS, you will also have to change an advanced option in Firefox. In the Firefox URL bar, enter “about:config” and hit Enter

creationsnet 3435 300x178 Get internet on a desktop or notebook through IPhone 3G

In Filter, type “socks” and then double-click “network.proxy.socks_remote_dns” to make its value “true”.

That should be all you need! Firefox should be able to browse the Internet through your iPhone’s 3G connection.

Tethering costs a lot of battery life on the iPhone so make sure you have it plugged in. When you’re done, make sure to quit Terminal by opening it back up and pressing and holding the Home button until it quits.

Thanks to cre.ations.net for this tutorial.