Browser | Jailbreak iPhone, iPod Touch, iPad Skip to content

Jailbreak iPhone, iPod Touch, iPad

новости про джейлбрейк iPhone, iPod Touch и iPad

Archive

Tag: browser

gp web win Step by step tutorial: untethered jailbreak iOS 4.2.1 on iPhone, iPod or iPad using Greenpois0n for Windows

These are step-by-step instructions on how to jailbreak iOS 4.2.1 on iPhone 3GS, iPhone 4, iPad, iPod Touch 2G, iPod Touch 3G, iPod Touch 4G using Greenpois0n for Windows. Tutorial for Mac OS X users is available here. All the steps are the same for all devices, we will cover iPhone.

Greenpois0n has been updated to support the iOS 4.1 and iOS 4.2.1 firmware. Use Limera1n if you want to jailbreak iOS 4.0, iOS 4.0.1, iOS 4.0.2.

Remember: Greenpois0n recommends a clean restore before continuing.

Unlockers: do not update to iOS 4.1 or iOS 4.2.1 if you need the unlock. Ultrasn0w does not support that baseband yet. The only exception is the iPhone 4. Experienced users can also try update to iOS 4.2.1 without upgrading your baseband by using TinyUmbrella. Start TSS Server->Start iTunes->Plug in your iPhone->Restore 4.2.1->Error 1013->Put phone into DFU Mode->Launch Greenpois0n.

We are not authors of this app. We do not promise that everything will go well, use this tutorial at your own risk.

Step One
Open your web browser and download the latest Windows version of GreenPois0n from here.

Step Two
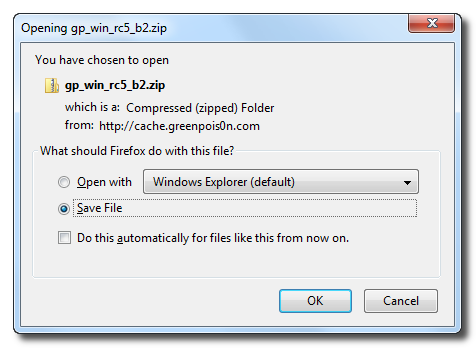
When prompted save the download to your desktop.
greenpois0n win 1 Step by step tutorial: untethered jailbreak iOS 4.2.1 on iPhone, iPod or iPad using Greenpois0n for Windows

Step Three
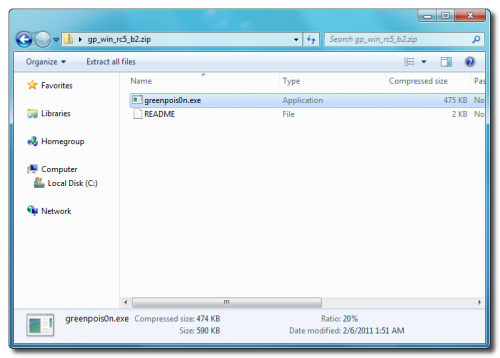
Double click the downloaded gp_win_rc5_b2.zip file then drag the greenpois0n.exe file to the desktop. Double greenpois0n.exe from the desktop to launch the application

greenpois0n win 2 500x358 Step by step tutorial: untethered jailbreak iOS 4.2.1 on iPhone, iPod or iPad using Greenpois0n for Windows

greenpois0n win 3 Step by step tutorial: untethered jailbreak iOS 4.2.1 on iPhone, iPod or iPad using Greenpois0n for Windows

Step Four
Connect your iPhone to the computer, power it off. Then click the large Prepare to Jailbreak (DFU) button in greenpois0n app.
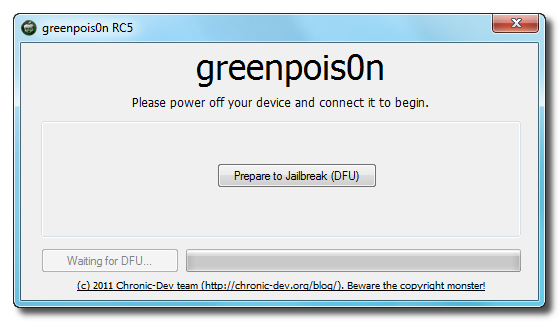
greenpois0n win 4 Step by step tutorial: untethered jailbreak iOS 4.2.1 on iPhone, iPod or iPad using Greenpois0n for Windows

Step Five

You will now be instructed on how to place your iPhone into DFU mode.
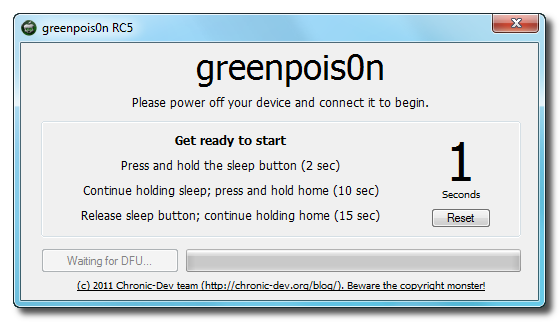
greenpois0n win 5 Step by step tutorial: untethered jailbreak iOS 4.2.1 on iPhone, iPod or iPad using Greenpois0n for Windows

You will be asked to press and hold the sleep button (power button) for 3 seconds.

greenpois0n win 6 Step by step tutorial: untethered jailbreak iOS 4.2.1 on iPhone, iPod or iPad using Greenpois0n for Windows

Now continue holding sleep button and and press home for 10 seconds.

greenpois0n win 7 Step by step tutorial: untethered jailbreak iOS 4.2.1 on iPhone, iPod or iPad using Greenpois0n for Windows

Release sleep button and continue holding the home button. Do not release the Home button at this point!.

greenpois0n win 8 Step by step tutorial: untethered jailbreak iOS 4.2.1 on iPhone, iPod or iPad using Greenpois0n for Windows

Step Six
Once your iPhone is successfully in DFU mode you may click the Jailbreak button. You need to continue holding the home button.

greenpois0n win 9 Step by step tutorial: untethered jailbreak iOS 4.2.1 on iPhone, iPod or iPad using Greenpois0n for Windows

Step Seven

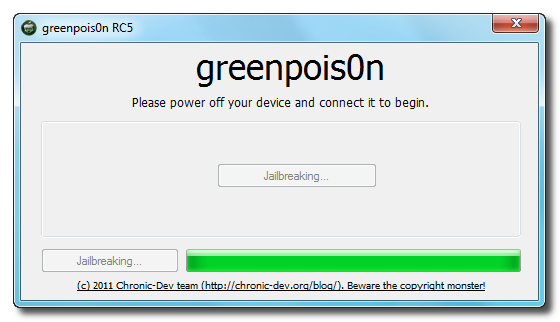
Greenpois0n will now jailbreak your device.

greenpois0n win 10 Step by step tutorial: untethered jailbreak iOS 4.2.1 on iPhone, iPod or iPad using Greenpois0n for Windows

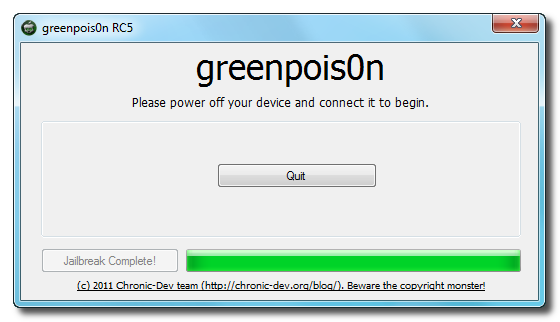
Click the Quit button once the software application has completed. Now you can release the Home button.

greenpois0n win 11 Step by step tutorial: untethered jailbreak iOS 4.2.1 on iPhone, iPod or iPad using Greenpois0n for Windows

You’ll notice some text scrolling on your device.

Step Eight
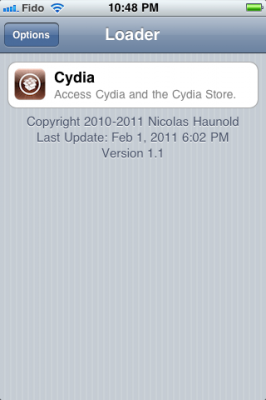
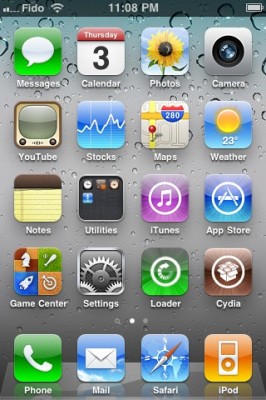
After the iPhone restarts you’ll see a new Loader application on your Springboard. Press to launch it.

greenpois0n rc5 s9 266x400 Step by step tutorial: untethered jailbreak iOS 4.2.1 on iPhone, iPod or iPad using Greenpois0n for Windows

Step Nine
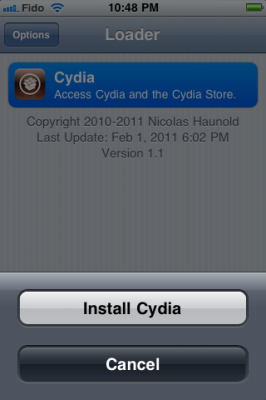
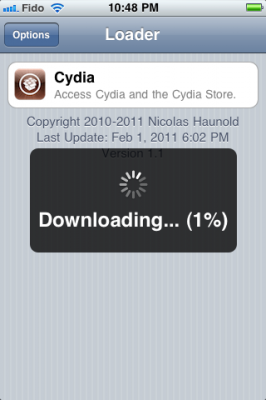
Select Cydia then press the large Install Cydia button that appears. Now Cydia will be downloaded from internet, so you need internet connection through wi-fi or edge/3g.

greenpois0n rc5 s10 266x400 Step by step tutorial: untethered jailbreak iOS 4.2.1 on iPhone, iPod or iPad using Greenpois0n for Windows greenpois0n rc5 s11 266x400 Step by step tutorial: untethered jailbreak iOS 4.2.1 on iPhone, iPod or iPad using Greenpois0n for Windows

Step Ten
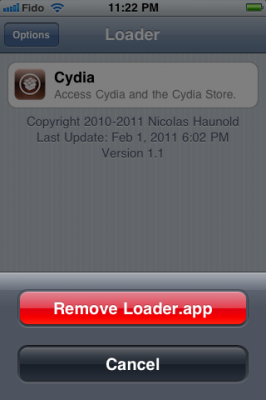
Once Cydia has installed successfully you can remove Loader by pressing the Options button then the large red Remove Loader.app button.

greenpois0n rc5 s12 266x400 Step by step tutorial: untethered jailbreak iOS 4.2.1 on iPhone, iPod or iPad using Greenpois0n for Windows greenpois0n rc5 s13 266x400 Step by step tutorial: untethered jailbreak iOS 4.2.1 on iPhone, iPod or iPad using Greenpois0n for Windows

Step Eleven
Restart your iPhone and run Cydia. Let it do all the necessary updates.

greenpois0n rc5 s14 266x400 Step by step tutorial: untethered jailbreak iOS 4.2.1 on iPhone, iPod or iPad using Greenpois0n for Windows

You’re done!

Update:To change the boot logo back to Apple: install “Apple Boot Logo” from Cydia, then go to Settings-BootLogo and select Apple Logo.

gp web1 Step by step tutorial: untethered jailbreak iOS 4.2.1 on iPhone, iPod or iPad using Greenpois0n for Mac OS

These are step-by-step instructions on how to jailbreak iOS 4.2.1 on iPhone 3GS, iPhone 4, iPad, iPod Touch 2G, iPod Touch 3G, iPod Touch 4G using Greenpois0n for Mac OS X. Tutorial for Windows users is available here. All the steps are the same for all devices, we will cover iPhone.

Greenpois0n has been updated to support the iOS 4.1 and iOS 4.2.1 firmware. Use Limera1n if you want to jailbreak iOS 4.0, iOS 4.0.1, iOS 4.0.2.

Remember: Greenpois0n recommends a clean restore before continuing.

Unlockers: do not update to iOS 4.1 or iOS 4.2.1 if you need the unlock. Ultrasn0w does not support that baseband yet. The only exception is the iPhone 4. Experienced users can also try update to iOS 4.2.1 without upgrading your baseband by using TinyUmbrella. Start TSS Server->Start iTunes->Plug in your iPhone->Restore 4.2.1->Error 1013->Put phone into DFU Mode->Launch Greenpois0n.

We are not authors of this app. We do not promise that everything will go well, use this tutorial at your own risk.

Step One
Open your web browser and download the latest Mac version of GreenPois0n from here.

Step Two
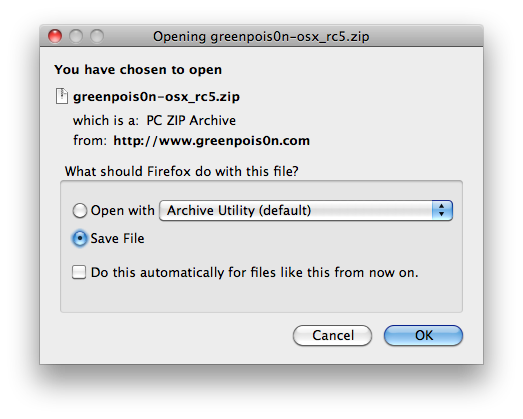
When prompted save the download to your desktop.

greenpois0n rc5 s1 Step by step tutorial: untethered jailbreak iOS 4.2.1 on iPhone, iPod or iPad using Greenpois0n for Mac OS

Step Three
Double click the downloaded greenpois0n-osx_rc5.zip file to extract the archive. Then double click greenpois0n icon from the desktop to launch the application.

greenpois0n rc5 s2 Step by step tutorial: untethered jailbreak iOS 4.2.1 on iPhone, iPod or iPad using Greenpois0n for Mac OS

Step Four
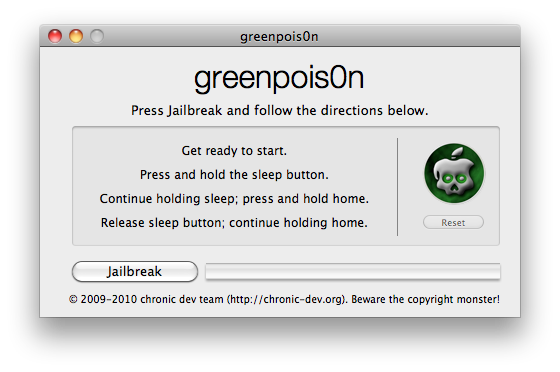
Connect your iPhone to the computer, power it off. Then click the large Jailbreak button in greenpois0n app.

greenpois0n rc5 s3 Step by step tutorial: untethered jailbreak iOS 4.2.1 on iPhone, iPod or iPad using Greenpois0n for Mac OS

Step Five

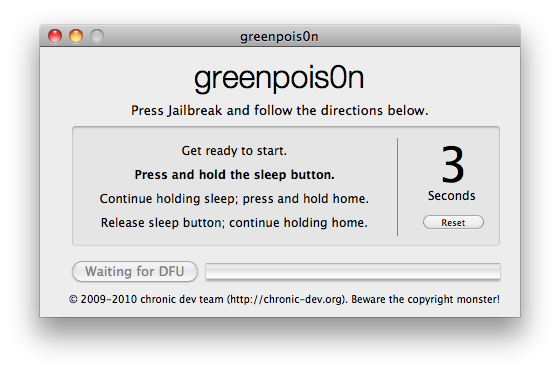
You will now be instructed on how to place your iPhone into DFU mode. You will be asked to press and hold the sleep button (power button) for 3 seconds.
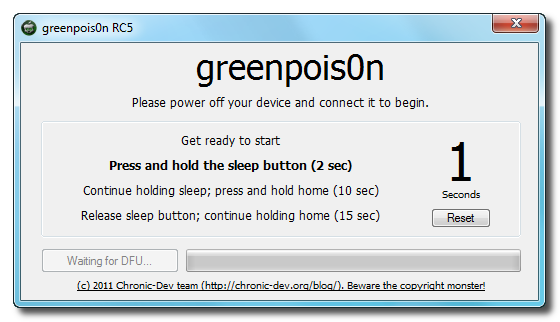
greenpois0n rc5 s4 Step by step tutorial: untethered jailbreak iOS 4.2.1 on iPhone, iPod or iPad using Greenpois0n for Mac OS

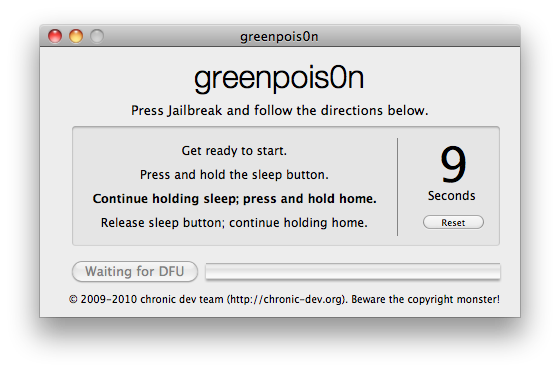
Now continue holding sleep button and and press home for 10 seconds.
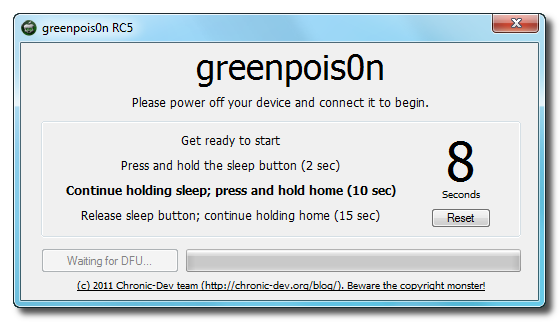
greenpois0n rc5 s5 Step by step tutorial: untethered jailbreak iOS 4.2.1 on iPhone, iPod or iPad using Greenpois0n for Mac OS

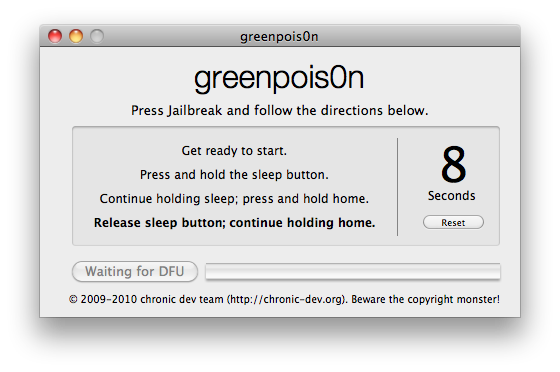
Release sleep button and continue holding the home button. Do not release the Home button at this point!.
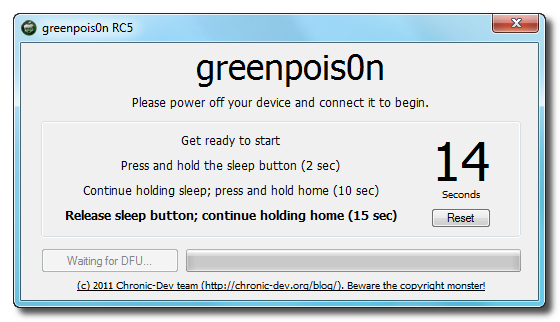
greenpois0n rc5 s6 Step by step tutorial: untethered jailbreak iOS 4.2.1 on iPhone, iPod or iPad using Greenpois0n for Mac OS

Step Six
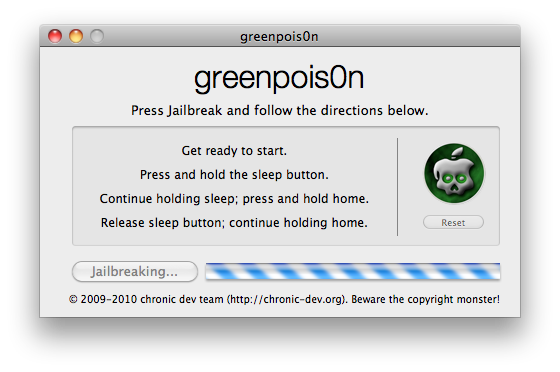
Once your iPhone is successfully in DFU mode the jailbreak will begin. You need to continue holding the home button.
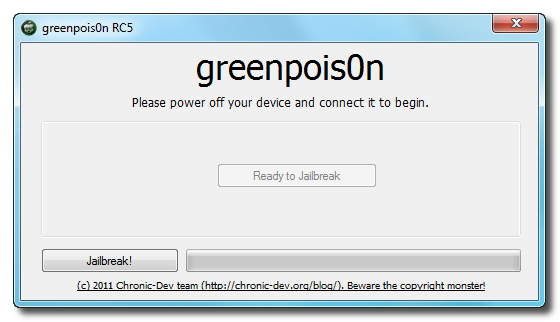
greenpois0n rc5 s7 Step by step tutorial: untethered jailbreak iOS 4.2.1 on iPhone, iPod or iPad using Greenpois0n for Mac OS

Step Seven
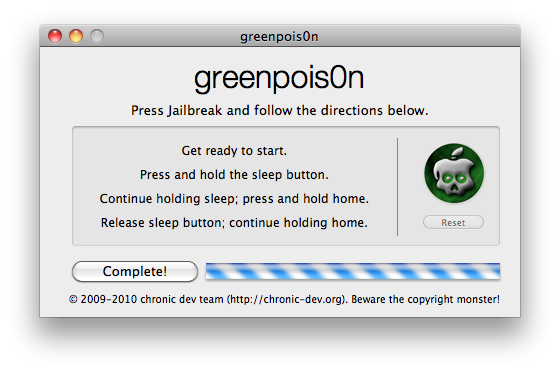
Now once Greenpois0n informs you that it has completed the jailbreak you can release the Home button.

Click the Complete button to close the application.

greenpois0n rc5 s8 Step by step tutorial: untethered jailbreak iOS 4.2.1 on iPhone, iPod or iPad using Greenpois0n for Mac OS

You’ll notice some text scrolling on your device.

Step Eight
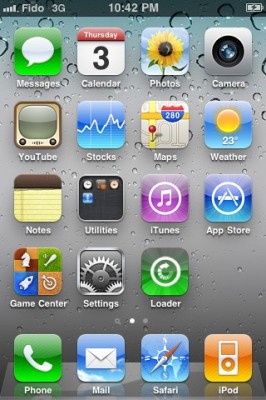
After the iPhone restarts you’ll see a new Loader application on your Springboard. Press to launch it.

greenpois0n rc5 s9 266x400 Step by step tutorial: untethered jailbreak iOS 4.2.1 on iPhone, iPod or iPad using Greenpois0n for Mac OS

Step Nine
Select Cydia then press the large Install Cydia button that appears. Now Cydia will be downloaded from internet, so you need internet connection through wi-fi or edge/3g.

greenpois0n rc5 s10 266x400 Step by step tutorial: untethered jailbreak iOS 4.2.1 on iPhone, iPod or iPad using Greenpois0n for Mac OS greenpois0n rc5 s11 266x400 Step by step tutorial: untethered jailbreak iOS 4.2.1 on iPhone, iPod or iPad using Greenpois0n for Mac OS

Step Ten
Once Cydia has installed successfully you can remove Loader by pressing the Options button then the large red Remove Loader.app button.

greenpois0n rc5 s12 266x400 Step by step tutorial: untethered jailbreak iOS 4.2.1 on iPhone, iPod or iPad using Greenpois0n for Mac OS greenpois0n rc5 s13 266x400 Step by step tutorial: untethered jailbreak iOS 4.2.1 on iPhone, iPod or iPad using Greenpois0n for Mac OS

Step Eleven
Restart your iPhone and run Cydia. Let it do all the necessary updates.

greenpois0n rc5 s14 266x400 Step by step tutorial: untethered jailbreak iOS 4.2.1 on iPhone, iPod or iPad using Greenpois0n for Mac OS

You’re done!

Update:To change the boot logo back to Apple: install “Apple Boot Logo” from Cydia, then go to Settings-BootLogo and select Apple Logo.
jailbreakme JailBreakMe on an iPhone 3G video

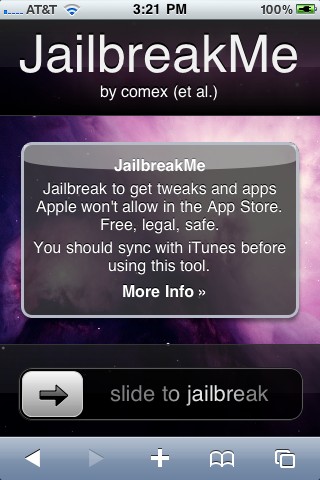
Here is the video of recently released universal safari jailbreak called JailBreakMe working on an iPhone 3G:

 New Jailbreak for iOS Devices is Browser Based

Starting today every owner of iPad, iPhone or iPod can easily jailbreak his device via browser on http://jailbreakme.com/

The site was created in a week after decision of the Library of Congress (that operates the Copyright Office), which states that jailbreaking isn’t illegal, though Apple claims it actually represents a threat to the stability and security of the company’s devices. Apple also says that jailbreaking voids the warranty, but such an action can be easily undone by resetting a device to the default factory settings.

Site JailbreakMe.com easily became a trending topic in Twitter after its announcement on RedmondPie.com. The jailbreak itself was created by hacker comex, and the website was done by chpwn and westbaer.

pwned RedSn0w is able to jailbreak iOS 4.1 beta 2

MuscleNerd tweeted today that the recent redsn0w utility is able to jailbreak the iOS 4.1 beta2 on iPhone 3G and iPod Touch 2G. This is useful for developers only, however good news for everyone.

Here’s some info from the DevTeam wiki page:

If you’ve updated to 4.1beta2 on iPhone3G or iPod2G(non-MC), you can use this redsn0w from June to jailbreak. Just point it at the 4.0 IPSW (the public one, not the developer GM one).

(Yes – point it at the 4.0 IPSW even though you’re at 4.1beta2).

Don’t do this if you need the ultrasn0w carrier unlock!!

Note 1: This won’t hacktivate your iPhone3G – but for those with legit access to the 4.1beta2 this shouldn’t matter. Please don’t pirate Apple software

Note 2: If you’re at 4.1beta2 you’ll probably experience network problems after jailbreaking. Until a new version of redsn0w is released, you may need to rely on afc2 access (such as FunBox-like file browser programs) to manipulate your filesystem.

Note 3: This is recommended only for power users who can deal with the problems that will pop up as the JB apps fall further behind the beta firmwares.

ima1 ImaSafari: show or hide images in webpages [Cydia] ima2 ImaSafari: show or hide images in webpages [Cydia]

ImaSafari allows iPhone users to turn off image downloading in Safari browser. This is very useful for GRPS, EGDE and 3G connectins. First of all webpages will be downloaded faster. Second – you will save money if you pay for inernet traffic.

This utility is avaliable for free via Cydia (for jailbreaked iPhones only).

To turn images on or off just install this software and go to Settings – Safari.

via spazio

ui iFunBox updated to v0.7.224.86
I use iFunBox a lot. This is a very useful utility for jailbreaked iPhones. Recently it was updated to version 0.7.224.86. Here is a download link.
What’s New:
1. Thumbnail view supported for wallpapers, camera and all other folders.
2. Support Symlink for the filesystem of firmware 2.0. All .app can be listed in Application folder.
3. Downloading music and movie from iPhone with filename encoded with album name and artist name.
4. Support E-Books, converting plain text to UTF-16 automatically.
5. Support Book Shelf, converting plain text to UTF-8 automatically.

Limitations:
Uploading music and movie to iPhone is now disabled on devices with firmware 2.x.

iphone 3g tethering Get internet on a desktop or notebook through IPhone 3G

Thanks to Dev Team and the porting work of Jay Freeman as well as the authors of 3Proxy, it is now possible to “tether” your iPhone 3G and use its Internet connection on your laptop.

Warning – Tethering your iPhone is against the iPhone data plan terms. AT&T could slap you with huge fees if you overuse this. I recommend only using it during emergencies.

Here is a basic plan (by the way, this should work for old IPhone also):

  • Jailbreak your iPhone 3G
  • Install 3Proxy and Terminal
  • Create an ad-hoc Wi-fi network using your laptop
  • Join the network with your iPhone
  • Find the iPhone’s IP address
  • Open Terminal and run the proxy program
  • Open Safari on your iPhone and open a web page
  • Configure your browser to use the proxy

Later we’ll discuss it with more details.

Step 1: Jailbreak your iPhone

Just download PWNageTool 2.0. Run it and follow the instructions. Make sure to add Cydia, when asked.

Step 2: Install 3Proxy and Terminal

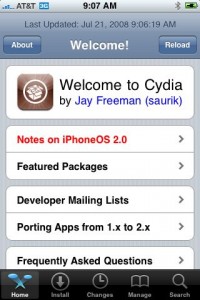
During the jailbreak, Cydia should have appeared on one of your app pages: use it and let Cydia load and self-update.

creationsnet 3428 200x300 Get internet on a desktop or notebook through IPhone 3G

Then head to Install, All Packages, then find MobileTerminal and 3Proxy (3Proxy is at the bottom). Install both and hit your Home button. Your phone will restart and you’ll see Terminal installed on your home screen. 3Proxy isn’t a GUI app and as such won’t have an icon.

Step 3: Create an ad-hoc Wifi network using your laptop

Using whatever wireless software suite you have, create an ad-hoc network. On a Mac it’s in the Airport menu, under “Create network…”. Name it something inconspicuous. I called mine “baladoux”. On your iPhone, join the ad-hoc network.

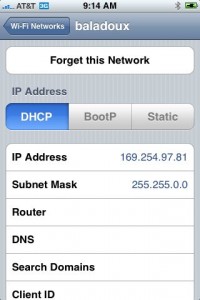
Step 4: Find your iPhone’s IP address

Then, hit the blue arrow next to it, and wait for your IP address to show up:

creationsnet 3430 200x300 Get internet on a desktop or notebook through IPhone 3G

Memorize (or write down) this IP address. You will need it later.

Step 5: Open Terminal and run the proxy program

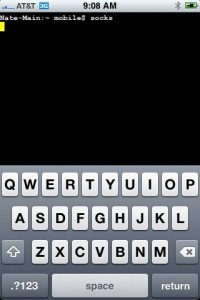
Simple enough. Open Terminal, type “socks” and hit return.

creationsnet 3431 200x300 Get internet on a desktop or notebook through IPhone 3G

Nothing will appear to happen, but the SOCKS server will be running. You can hit the home button to push Terminal to the background (remember to terminate it later, by switching back to Terminal and holding the Home button until it closes).

Step 6: Open Safari on the iPhone and open a web page

Any page will do. I recommend http://jailbreak-iphone.ru

This step is important. The page will take a while to load. When Safari realizes it can’t get to the Internet using the ad-hoc Wifi, it will do some internal magic to switch back to 3G for Internet while still on your ad-hoc network. That lets the proxy do its thing.

Step 7: Configure your browser

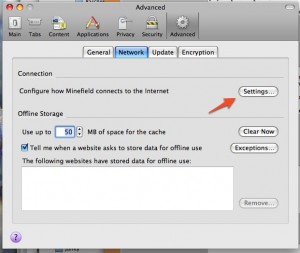
In Firefox, head to Preferences, and under Advanced, Network, hit Settings:

creationsnet 3433 300x253 Get internet on a desktop or notebook through IPhone 3G

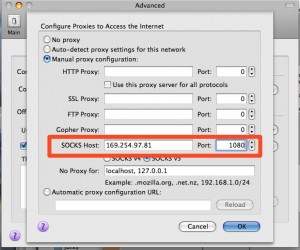
Then, fill in the iPhone’s IP address (which you memorized earlier) into the SOCKS Host field, and put 1080 as the port number. Make sure all other proxy fields are blank and/or 0 as shown:

creationsnet 3434 300x250 Get internet on a desktop or notebook through IPhone 3G

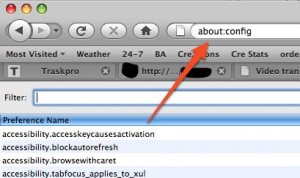
Then, since the proxy doesn’t forward DNS, you will also have to change an advanced option in Firefox. In the Firefox URL bar, enter “about:config” and hit Enter

creationsnet 3435 300x178 Get internet on a desktop or notebook through IPhone 3G

In Filter, type “socks” and then double-click “network.proxy.socks_remote_dns” to make its value “true”.

That should be all you need! Firefox should be able to browse the Internet through your iPhone’s 3G connection.

Tethering costs a lot of battery life on the iPhone so make sure you have it plugged in. When you’re done, make sure to quit Terminal by opening it back up and pressing and holding the Home button until it quits.

Thanks to cre.ations.net for this tutorial.

Run

This is a tutorial, that shows step by step how to use installed Java on the IPhone. Just in case you do not have Java installed on your IPhone there is a tutorial how to do it.

What we need is a working jailbraked IPhone with Java Installed. I used latest firmware 1.1.4, unlocked, jailbreaked and customized by winpwn.

Step 1: Create simple Java application, compile and run.

  1. Create file Java4IPhone.java and put simple Java hello-world code there. I used the following code:Create Java hello-world
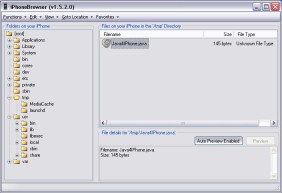
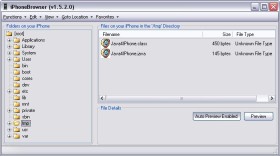
  2. Upload to IPhone. I used /tmp directory. For uploading I used IPhone Browser.
  3. Run Terminal.
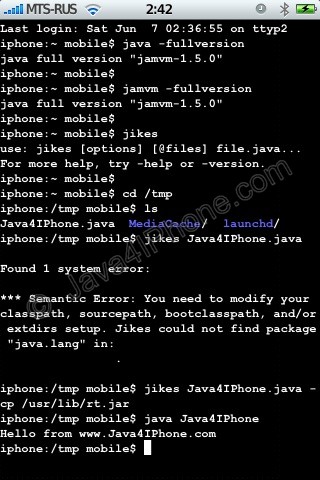
  4. Use command java -fullversion or jamvm -fullversion to see if java is avaliable.
  5. Use command jikes to invoke java compiler.
  6. Go to /tmp directory, using command cd /tmp
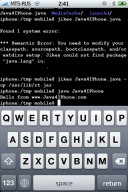
  7. Compile. We need to specify classpath to basic java packages. If we do not do that, jikes will produce an error (see screenshot). So use the following command: jikes Java4IPhone.java -cp /usr/lib/rt.jar
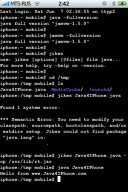
  8. After compiling Java4IPhone.class file should appear in the same directory. To run use commandjava Java4IPhone
  9. Take a look at the screenshots. Hopefully you’ll have something similar.

Upload Java application to IPhone

Check Java and Jikes Compile using Jikes Run

Upload Java application to IPhone

Step 2: Have fun!