Mac OS X | Jailbreak iPhone, iPod Touch, iPad - Part 4 Skip to content

Jailbreak iPhone, iPod Touch, iPad

новости про джейлбрейк iPhone, iPod Touch и iPad

Archive

Tag: Mac OS X

These are instructions on how to jailbreak your iPhone using PwnageTool 4.1 for Mac OS X. If you need unlock and you have not updated to iOS 4 you will be able to preserve baseband and unlock iPhone using ultrasn0w.

This guide will work for iPhone 4, iPhone 3GS, iPhone 3G, iPod Touch 3G, iPod Touch 4G, iPad and AppleTV. Just use the right firmware and select the right device (step four).

Step One
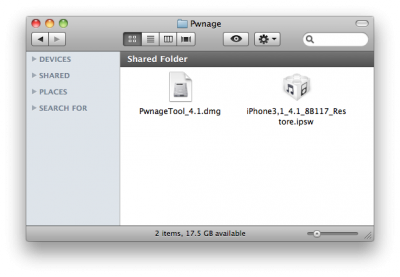
Make a folder called “Pwnage” on the desktop. Now you need to download there PwnageTool 4.1 from here and iOS 4.1 firmware from here.

When downloading the IPSW file, it is best to download it with Firefox since Safari often auto extracts it!

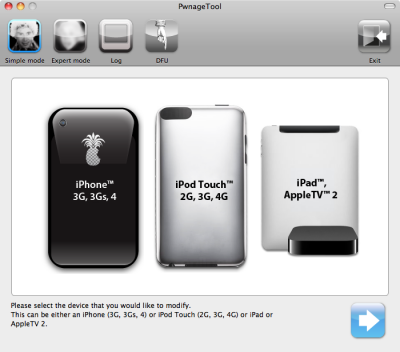
pwnagetool 41 1 400x277 Step by step Tutorial: how to jailbreak and unlock your iPhone using PwnageTool 4.1.2 (Mac)

Step Two
Double click to mount PwnageTool then drag the PwnageTool icon into the Pwnage folder.
Read the rest of this entry

pwnagetool 4 1 400x352 PwnageTool 4.1 released

The iPhone DevTeam has just released jailbreak utility PwnageTool 4.1 for Mac OS X.

PwnageTool allows you to restore to a custom IPSW file. The main advantage of PwnageTool is for unlockers. It gives the ability to keep current baseband and preserve ultrasn0w unlock. This is only for those, who have not updated to iOS 4.1 by themseleves.

You can also add whatever packages you want in the “Expert” mode of PwnageTool, if you wish to pre-install something from Cydia.

Here is a list of supported devices:

  • iPhone4
  • iPhone 3GS
  • iPhone 3G
  • iPad (firmware 3.2.2)
  • AppleTV 2G
  • iPod touch 4G
  • iPod touch 3G

You can download PwnageTool 4.1 here.

limera1n tutorial 8 Step by step Tutorial: how to jailbreak iOS 4.0 4.1 on iPhone or iPod using Limera1n (Mac)

These are instructions on how to jailbreak your iPhone 3GS (all bootroms) or iPhone 4 using Limera1n for Mac OS X. Limera1n supports iOS 4.0, iOS 4.0.1, iOS 4.0.2 and iOS 4.1. Use the same steps to jailbreak iPod Touch 4G and iPod Touch 3G and even iPad. You can find the Windows version of this tutorial here.

Remember: Do not update to iOS 4.1 if you need the unlock. Ultrasn0w does not support that baseband yet.

Step 1
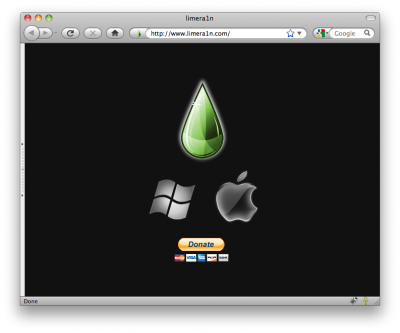
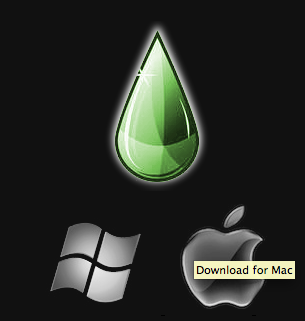
Open your browaer and navigate to www.limera1n.com and download LimeRa1n for Mac by clicking on the Mac logo.

limera1n mac 1 400x333 Step by step Tutorial: how to jailbreak iOS 4.0 4.1 on iPhone or iPod using Limera1n (Mac)

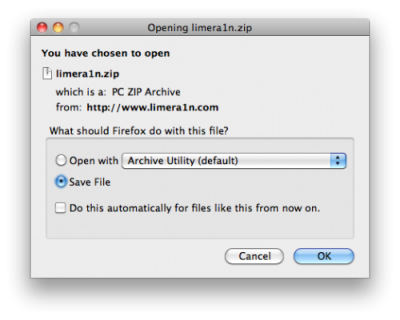
When prompted save the download to your desktop.

limera1n mac 2 400x320 Step by step Tutorial: how to jailbreak iOS 4.0 4.1 on iPhone or iPod using Limera1n (Mac)

Step 2
Double click the limera1n.zip file from the desktop to extract the application, then double click it to launch.

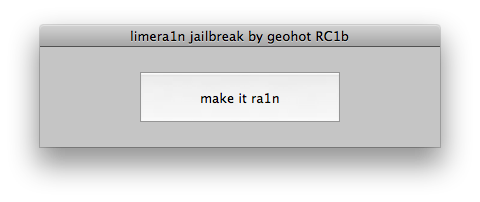
limera1n mac 3 Step by step Tutorial: how to jailbreak iOS 4.0 4.1 on iPhone or iPod using Limera1n (Mac)

Step 3
Connect your iPhone to the computer and click the large make it ra1n button

limera1n mac 4 Step by step Tutorial: how to jailbreak iOS 4.0 4.1 on iPhone or iPod using Limera1n (Mac)

Step 4
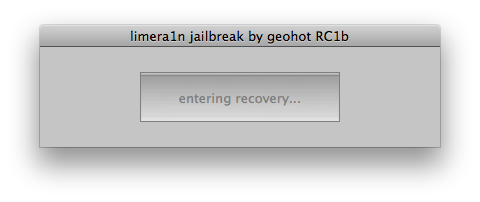
You iPhone will now be placed in recovery mode.
limera1n mac 5 Step by step Tutorial: how to jailbreak iOS 4.0 4.1 on iPhone or iPod using Limera1n (Mac)

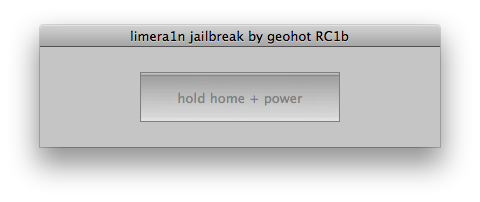
Follow instructions:

Press both the power and the home buttons.
limera1n mac 6 Step by step Tutorial: how to jailbreak iOS 4.0 4.1 on iPhone or iPod using Limera1n (Mac)

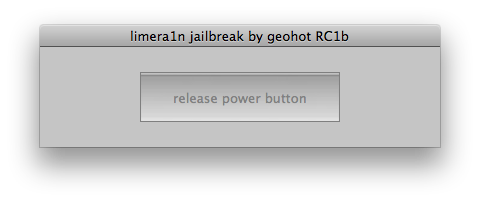
When Limera1n asks you to, release the power button.
limera1n mac 7 Step by step Tutorial: how to jailbreak iOS 4.0 4.1 on iPhone or iPod using Limera1n (Mac)

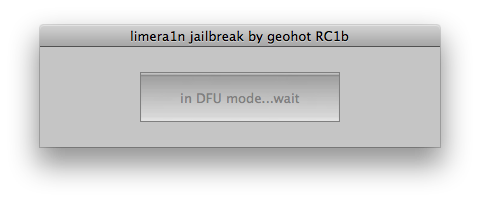
Your phone will now be in DFU mode
limera1n mac 8 Step by step Tutorial: how to jailbreak iOS 4.0 4.1 on iPhone or iPod using Limera1n (Mac)

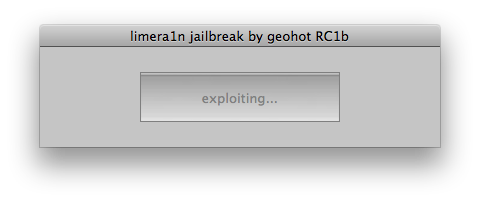
As limera1n performs its exploit you will see the image of a lime raindrop on your iPhone.
limera1n mac 9 Step by step Tutorial: how to jailbreak iOS 4.0 4.1 on iPhone or iPod using Limera1n (Mac)

limera1n mac 10 Step by step Tutorial: how to jailbreak iOS 4.0 4.1 on iPhone or iPod using Limera1n (Mac)

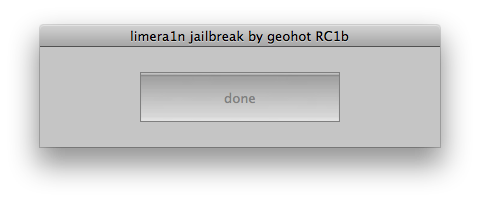
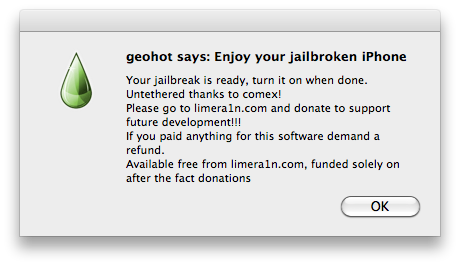
Limera1n will let you know when it is complete.
limera1n mac 11 Step by step Tutorial: how to jailbreak iOS 4.0 4.1 on iPhone or iPod using Limera1n (Mac)

limera1n mac 12 Step by step Tutorial: how to jailbreak iOS 4.0 4.1 on iPhone or iPod using Limera1n (Mac)

Step 5
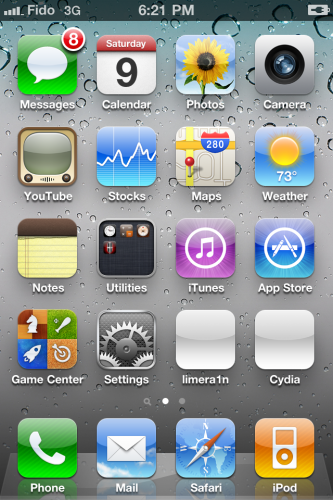
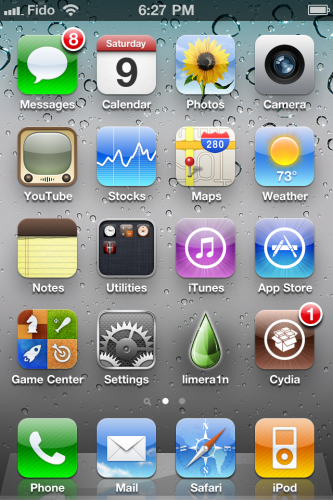
After you power back on your iPhone you will see a new icon on the SpringBoard entitled limera1n. Press it to continue.

limera1n tutorial 14 Step by step Tutorial: how to jailbreak iOS 4.0 4.1 on iPhone or iPod using Limera1n (Mac)

Step 6
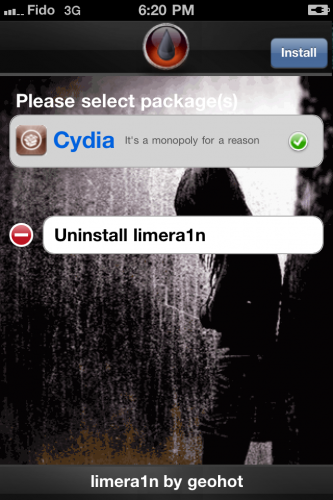
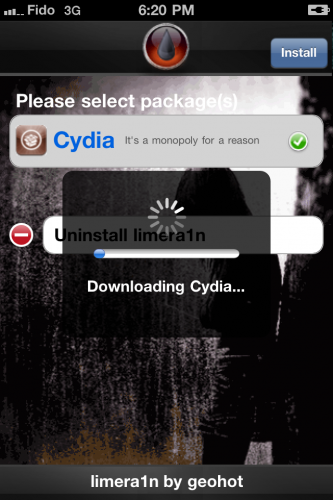
Once Limera1n opens select Cydia then press the Install button at the top right of the screen.

limera1n tutorial 12 Step by step Tutorial: how to jailbreak iOS 4.0 4.1 on iPhone or iPod using Limera1n (Mac)limera1n tutorial 13 Step by step Tutorial: how to jailbreak iOS 4.0 4.1 on iPhone or iPod using Limera1n (Mac)

Step 7
Once the Cydia installation has completed you must reboot your iPhone.

limera1n tutorial 14 Step by step Tutorial: how to jailbreak iOS 4.0 4.1 on iPhone or iPod using Limera1n (Mac)

Step 8
When your iPhone has restarted you can run Cydia. Let it do all the necessary updates

limera1n tutorial 15 Step by step Tutorial: how to jailbreak iOS 4.0 4.1 on iPhone or iPod using Limera1n (Mac)

NOTE*: To remove the limera1n icon from your desktop you can install CyDelete from Cydia then use it to delete the application as you delete regular AppStore apps.

UPdate: To have access to the root file system of your iPhone (via file managers like iFunBox) install application called afc2add in Cydia.

If you need unlock – install ultrasn0w via Cydia. Works for up to iOS 4.0.2.

limara1n mac Limera1n Jailbreak for iPhone/iPod/iPad is now available for Mac OS

Geohot has just released his Limera1n jailbreak for Mac OS X. Limera1n supports the following Apple devices:

Limera1n was the first jailbreak utility to support iOS 4.1. It also works with iOS 4.0, iOS 4.0.1 and iOS 4.0.2.

Remember if you need an unlock do not upgrade to iOS 4.1, just wait for the next PwnageTool release.

You can find our LimeRa1n tutorials tutorials:

You can download Limera1n from here

pwnage Pwnagetool for iPhone with iOS 4.1 will be released by Sunday

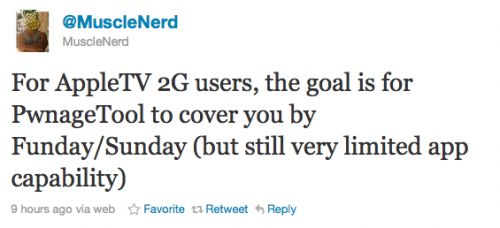
Hacker MuscleNerd has tweeted that the DevTeam plans to release PwnageTool for iOS 4.1 in several days.

For AppleTV 2G users, the goal is for PwnageTool to cover you by Funday/Sunday (but still very limited app capability)

This release should also bring jailbreak for iPod touch and iPad Mac users.

PwnageTool is a Mac OS X jailbreak tool. One of it’s advantages is the ability to preserve old baseband, which means you can have firmware iOS 4.1 with baseband from iOS 4.0 (if you haven’t updated to 4.1 already). And this brings unlcok, because iOS 4.0 is unlockable.

pwnagetool 41 Pwnagetool for iPhone with iOS 4.1 will be released by Sunday

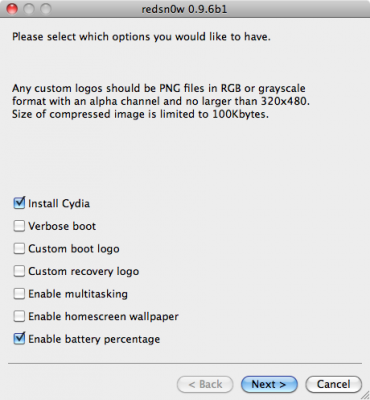
redsn0w 0 9 6 b1 370x400 Jailbreak iOS 4.1 with RedSn0w 0.9.6 b1 is now available for Windows

RedSn0w 0.9.6 b1 for Mac OS X was released a while ago. Today DevTeam created a version for Windows users. RedSn0w 0.9.6 b1 can jailbreak iOS 4.1 and iOS 4.1 running on iPhone 3G or iPod touch 2G.

You can download it here.

Redsn0w is easy to use:

  1. Download firmware here.
  2. Launch redsn0w 0.9.6 b1
  3. Select your stock 4.1 or 4.0 ipsw (you’ve already used this to update your device to 4.1 or 4.0)
  4. Select “Install Cydia” and any of the other options shown above, then click “Next”. Use DFU mode to install the jailbreak.

This is still beta, so there might be some problems:

Any Windows users seeing “Waiting for reboot” for too long (more than 20 seconds or so), please try “shaking” the JB process by unplugging then replugging your USB cable (while letting redsn0w continue to run). Also, try using a USB port “closer” to your computer (as opposed to on your monitor or behind another hub).

As usual DevTeam reminds us:

IF YOU USE THE ULTRASN0W UNLOCK, PLEASE WAIT FOR PWNAGETOOL TO SUPPORT 4.1. DO NOT USE REDSN0W

That’s because to use redsn0w at 4.1, you need to already have updated to official 4.1 from Apple. If you do that, you lose the ultrasn0w unlock (possibly forever).

redsn0w 0 9 6 b1 370x400 Jailbreak iOS 4.1 with RedSn0w 0.9.6 b1

DevTeam recently released new version of redsn0w to jailbreak iOS 4.1. New RedSn0w 0.9.6 b1 supports iOS 4.0 and iOS 4.1 running on iPhone 3G or iPod touch 2G.

There is only Mac OS X x86 version, that you can download here.

Redsn0w is easy to use:

  1. Download firmware here.
  2. Launch redsn0w 0.9.6 b1
  3. Select your stock 4.1 or 4.0 ipsw (you’ve already used this to update your device to 4.1 or  4.0)
  4. Select “Install Cydia” and any of the other options shown above, then click “Next”.  Use DFU mode to install the jailbreak.

As usual DevTeam reminds us:

IF YOU USE THE ULTRASN0W UNLOCK, PLEASE WAIT FOR PWNAGETOOL TO SUPPORT 4.1.  DO NOT USE REDSN0W

That’s because to use redsn0w at 4.1, you need to already have updated to official 4.1 from Apple.  If you do that, you lose the ultrasn0w unlock (possibly forever).

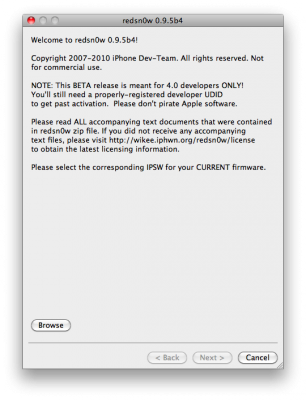
redsn0w095b4 306x400 Redsnow 0.9.5.b4 for iPhone Os 4.0 Beta 4 Released

Last week Apple has released its iPhone Os 4.0 beta 4 and redsn0w is finally updated to support this as well as beta 1. New version of jailbreak is 0.9.5.b4 and it can be applied on iPhone 3G only(!).

Redsn0w 0.9.5.b4 is targeted at developers who make jailbroken apps, and will not work if you are already using blacksn0w, ultrasn0w or yellowsn0w.

iPhone Dev-Team warns:

“You should stay clear of this beta software if you rely on a carrier unlock.”

To use the jailbreak, follow the guide below:

  1. Download redsn0w 0.9.5.b4 here. (Only Mac OS X version since app are developed on this OS).
  2. Make sure you have already activated your iPhone 3G with iTunes and your own developer ID.
  3. Launch the jailbreak.
  4. Select your stock iPhone1,2_4.0_8A274b_Restore.ipsw (beta4) or iPhone1,2_4.0_8A230m_Restore.ipsw (beta1) file that you used to update your firmware.
  5. Choose “Install Cydia” and then click “Next”. Use DFU mode to install the redsn0w.
  6. When your iPhone 3G comes back up, you will notice Cydia has a blank white icon. It also has no sources so you should go to the Sources panel and add this repo: http://apt.saurik.com/cydia-3.7 (make sure you are connected to the Internet before). When Cydia restarts, you should see its real logo now, and the standard sources should be ready to use.

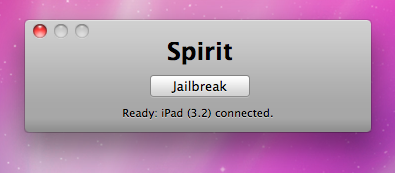
spirit jailbreak How To Recover Deleted Photos After Spirit Jailbreak

The first release of Spirit had a bug that accidently could delete all of your photos from the device that was jailbroken. If you have a backup which you made before jailbreaking your iPhone/iPod Touch/iPad, here is a quick guide how to recover deleted photos.

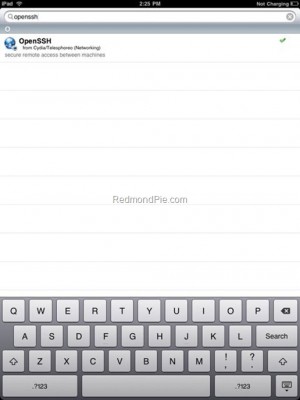
1. Open Cydia and search for “OpenSSH” and then install it. Reboot your device.

OpenSSHoniPad 300x400 How To Recover Deleted Photos After Spirit Jailbreak

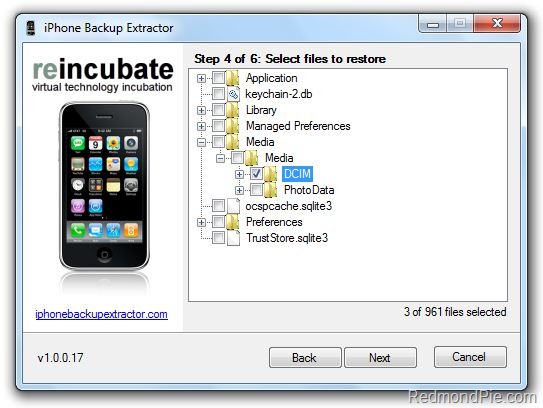
2. Download and then install iPhone Backup Extractor.

3. Run iPhone BackUp Extractor. Select your last backup (that was made before jailbreak)

4. Navigate to Media/Media and select DCIM folder. Click “Next” and program will save the files locally.
iPhoneBackupExtractor1 How To Recover Deleted Photos After Spirit Jailbreak

5. Download and then istall WinSCP for Windows or Cyberduck for Mac . Open it and enter the following data to login to your device.

WinSCP for Windows

  • Hostname: The IP address of your device. (Settings –> WiFi –> <Your Network Name>)
  • Protocol: SCP
  • User name: root
  • Password: alpine

WinSCP

Cyberduck for Mac OS X

  • Server: The IP address of your device. (Settings –> WiFi –> <Your Network Name>)
  • Protocol: SFTP
  • Username: root
  • Password: alpine

CyberDuck

6. Go to /User/Media directory and then copy over the DCIM folder.

7. Reboot your device.

After that you’ll have all your backuped photos back.

spirit jailbreak JailBreak for iPad is Finally Available!

Finally the jailbreak for iPad, iPhone and iPod Touch from the Dev Team is available for download. It’s free and untethered and it’s called “Spirit”. The jailbreak supports every iDevice with firmware version 3.1.2, 3.1.3 or 3.2.

If you have iPhone 3GS or an iPad you should backup your SHSH blobs before using the jailbreak. ECID SHSH or SHSH blob is a unique signature given to every Apple mobile device. When you decide to restore the firmware on your iPhone, iPod Touch or iPad, Apple servers checks this signature.

As you know, if a new firmware is released it becomes impossible to restore the older firmware from iTunes. But Cydia creator tuned up a new server and now it mimics Apple’s verification server and saves your older SHSH blobs so that you can restore back your device to the older firmware. Without having your SHSH blobs saved you may accidentally update new firmware and then you not only lose your jailbreak but also won’t be able to restore the older firmware to re-jailbreak your device.

This is also important because there is a big possibility that Apple will soon find out what exploit is used by the jailbreak and then it will be patched in the form of new firmware.

You can save your SHSH blob in three ways. Here is a guide to make it using AutoSHSH.

  1. Download AutoSHSH. (Latest version is here).
  2. SHSHBlobs JailBreak for iPad is Finally Available!

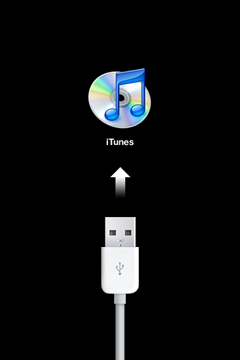
  3. Start AutoSHSH and plug in you iPhone/iPod Touch/iPad in recovery mode (only one device at a time). Recovery mode launches when you turn off your device and hold down the “Home” button when connecting the USB cable. Then you must see “Connect to iTunes” message and logo on your device.
  4. TS1275 JailBreak for iPad is Finally Available!

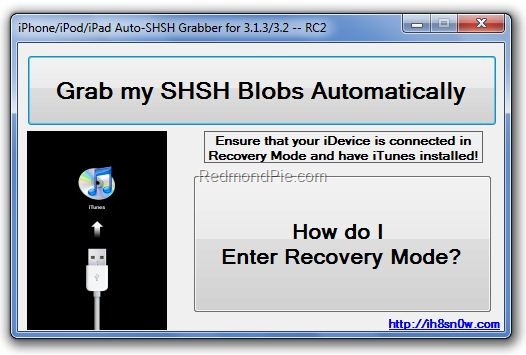
  5. In AutoSHSH click on “Grab my SHSH Blobs Automatically”. When the app will grab the signature you must choose whether you want to save it locally or not. Do not forget where you saved the signature. In the end of the procedure AutoSHSH will also upload it to saurik’s server.
  6. SHSHBlobs1 JailBreak for iPad is Finally Available!

If you have some problems with using AutoSHSH to save your blobs, write it in comments or try saurik’s method or Firmware Umbrella instead.

Now, when you saved you SHSH blobs, you can make the jailbreak. It is recommended for you to sync your device with iTunes beforehand. Then use the following guide:

  1. Download “Spirit” (link for Windows, link for Mac OS X).
  2. Plug in your device (it will be instantly recognized).
  3. Hit the “Jailbreak” button.

That’s all!

Additionally here is a video tutorial for jailbreaking:

Please note that Spirit is not a carrier unlock so it won’t allow you to use unauthorized wireless carriers. The jailbreak is also “sort of beta”, so it may be buggy. DevTeam notifies that some apps in Cydia that are NOT designed for iPad may crash your system and require you to restore so be careful.