OpenSSH | Jailbreak iPhone, iPod Touch, iPad Skip to content

Jailbreak iPhone, iPod Touch, iPad

новости про джейлбрейк iPhone, iPod Touch и iPad

Archive

Tag: OpenSSH

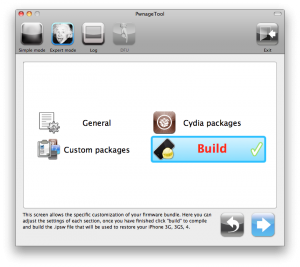
pwnagetool413 3gs 3 300x267 Step by step Tutorial: jailbreak iOS 4.2.1 on iPhone/iPod/iPad using PwnageTool 4.2 (Mac OS)

UPDate: save your iOS 4.2.1 SHSH blobs now!

UPDate 2: Attention! We’ve received info, that Apple stopped signing iOS 4.2 for devices for which iOS 4.3 is available. This means you will not be able to restore to 4.2.1 without saved SHSH keys.

Using this tutorial you will be able to jailbreak iOS 4.2.1 running on iPhone 3G, iPhone 3GS, iPhone 4, iPod Touch 3G, iPod Touch 4G and iPad. Pwnagetool will also preserve baseband version if you need carrier unlock. If you have updated the baseband to version 06.15, you can use this tutorial. This tutorial uses PwnageTool 4.2 for Mac OS X.

We are not developers of jailbreak utilities, so we cannot assure that everything will work just fine. However we tried this tutorial on several devices and succeeded.

We will use iPhone 4 in our jailbreak tutorial. The process is the same for all devices.

Step One
Make a folder called “Pwnage” on the desktop. Download a couple of things:
Read the rest >>>

MobileTerminal iPhone4 04 500x333 Step By Step Tutorial: How to install MobileTerminal on iPhone with iOS 4.x

MobileTerminal is a terminal emulator application for the iPad and iPhone. The version of MobileTerminal that is available in Cydia doesn’t work with iPhone iOS 4.x. However there are beta versions that do work, but aren’t on Cydia because they are still in beta stages. This tutorial will show you step-by-step how to install MobileTerminal on iPhone with iOS 4.x (tutorial for iPad is here). If you have old version of MobileTerminal installed – uninstall it in Cydia (Search – MobileTerminal – Remove).

First of all you need to jailbreak your iPhone. If you have not done it already here is an easy tutorial: how to jailbreak iOS 4.0-4.1 on iPhone using Limera1n. After you successfully jailbreaked iPhone:

  1. Run Cydia by tapping on Cydia icon
  2. cydia icon Step By Step Tutorial: How to install MobileTerminal on iPhone with iOS 4.x

  3. The Cydia will start:

Read the rest of this entry

MobileTerminal iPad 05 500x375 Step By Step Tutorial: How to install MobileTerminal on Apple iPad

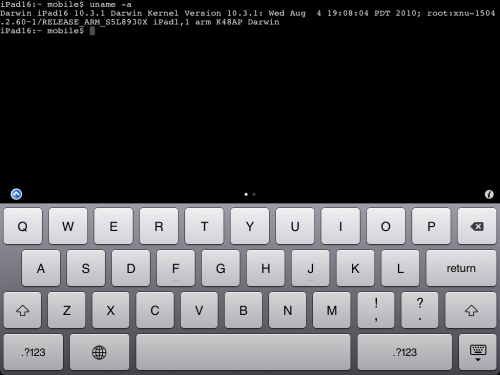
MobileTerminal is a terminal emulator application for the iPad and iPhone. The version of MobileTerminal that is available in Cydia doesn’t work with iPad iOS 3.2.2 and iPhone iOS 4.x. However there are beta versions that do work, but aren’t on Cydia because they are still in beta stages. This tutorial will show you step-by-step how to install MobileTerminal on iPad (tutorial for iPhone is here). If you have old version of MobileTerminal installed – uninstall it in Cydia (Search – MobileTerminal – Remove).

First of all you need to jailbreak your iPad. Here is an easy tutorial: how to jailbreak iPad with iOS 3.2.2 using Limera1n. After you successfully jailbreaked iPad:

  1. Run Cydia by tapping on Cydia icon
  2. cydia icon Step By Step Tutorial: How to install MobileTerminal on Apple iPad

  3. The Cydia will start:

Read the rest of this entry

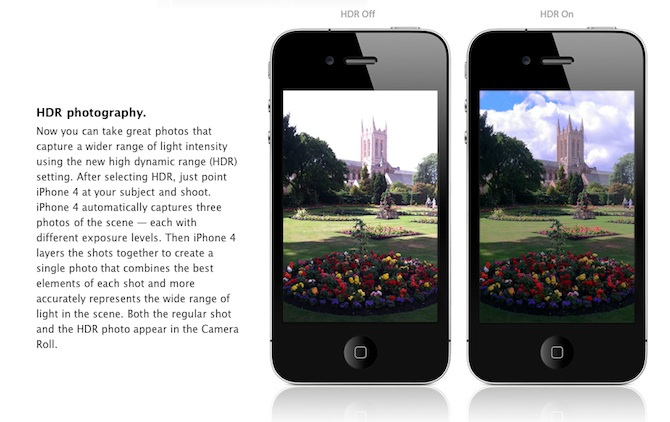
HDR iPhone 3 3GS Check out HDR photos on iPhone 3G or 3GS!

Are you looking forward to add a very popular HDR feature to your old iPhone? Do not worry! If you have a jailbroken (or ready to jailbreak) iPhone 3GS or 3G that runs on iOS 4.1, you can enable HDR photos. Here is a quick tutorial:

  • Make certain that you’ve installed OpenSSH via Cydia. When the application is installed, you’ll see SSH on your iPhone 3GS or 3G (it is recommended to use the «passwd» command to change your password from the standard «alpine»)
  • If you have an iPhone 3G, save the file, which is in / System/Library/CoreServices/SpringBoard.app/N82AP.plist
  • If you have an iPhone 3GS, save the file located at /System/Library/CoreServices/SpringBoard.app/N88AP.plist
  • Add a key «hdr-image-capture» with the “true” value
  • Save the file and use SSH to change a copy on your device with the modified version
  • Restart the SpringBoard or reboot your device. Now you’ve got access to the HDR settings in the application of your camera.

via

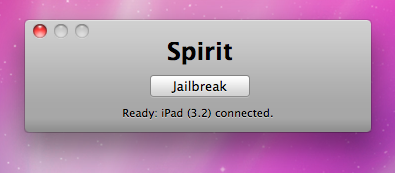
spirit jailbreak How To Recover Deleted Photos After Spirit Jailbreak

The first release of Spirit had a bug that accidently could delete all of your photos from the device that was jailbroken. If you have a backup which you made before jailbreaking your iPhone/iPod Touch/iPad, here is a quick guide how to recover deleted photos.

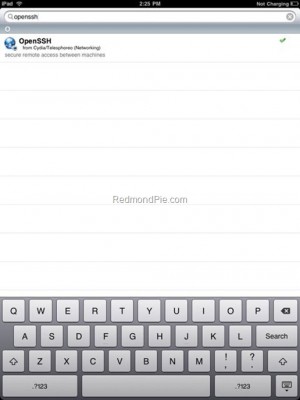
1. Open Cydia and search for “OpenSSH” and then install it. Reboot your device.

OpenSSHoniPad 300x400 How To Recover Deleted Photos After Spirit Jailbreak

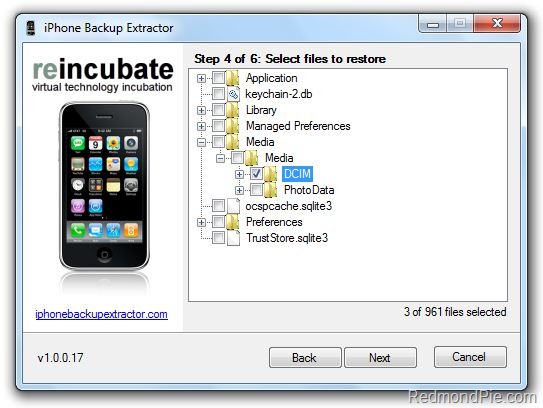
2. Download and then install iPhone Backup Extractor.

3. Run iPhone BackUp Extractor. Select your last backup (that was made before jailbreak)

4. Navigate to Media/Media and select DCIM folder. Click “Next” and program will save the files locally.

iPhoneBackupExtractor1 How To Recover Deleted Photos After Spirit Jailbreak

5. Download and then istall WinSCP for Windows or Cyberduck for Mac . Open it and enter the following data to login to your device.

WinSCP for Windows

  • Hostname: The IP address of your device. (Settings –> WiFi –> <Your Network Name>)
  • Protocol: SCP
  • User name: root
  • Password: alpine

WinSCP

Cyberduck for Mac OS X

  • Server: The IP address of your device. (Settings –> WiFi –> <Your Network Name>)
  • Protocol: SFTP
  • Username: root
  • Password: alpine

CyberDuck

6. Go to /User/Media directory and then copy over the DCIM folder.

7. Reboot your device.

After that you’ll have all your backuped photos back.

IMG 0079 21 300x400 Tutorial: how to connect external HDD to Apple iPad

iPad USB Camera Connection Kit is much more useful as it seems. Max Sha, an experienced user, was able to access external hard drive with this kit. All you need is a jailbroken iPad, an external drive, a split-USB cable to give the drive some power and a terminal of some sort (f.e. MacBook) to mount the external storage. While it is a little unwieldy, it shows that Terabytes of external storage for iPad is possible.

Here is a complete step-by-step guide from Max Sha:

For starters, you will need to do the following:

1. Have an external hard drive formatted to either HFS or FAT32. NOTE: All data will be erased!

2. Perform the Spirit Jailbreak.

3. In Cydia, install iFile ($4.00 for full version, but there is also a free trial) and OpenSSH (free)

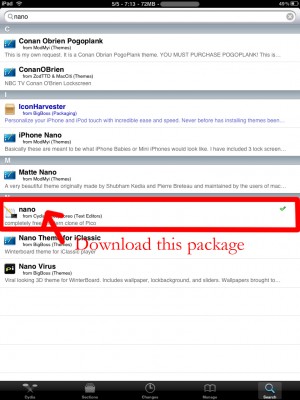
4. As well, install the “Nano” terminal text edit from Cydia.

Fig 5 300x400 Tutorial: how to connect external HDD to Apple iPad

5. For this particular example Max used GoodReader app for iPad ($0.99).

Now you can begin the process of mounting your hard drive. You will need external power for the drive. If you have an external drive with power (one that has a USB port and an external power supply) you won’t need to worry about this. If you have external drive with just an USB cord you will need a split USB cord.

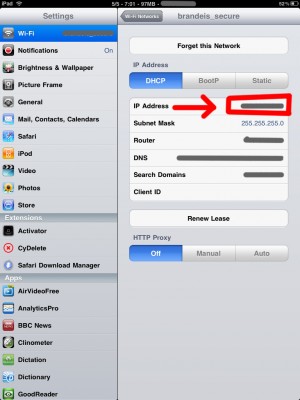
1. Open “Settings” on your iPad to find your IP address (make sure you’re on the same network as your iPad).

Fig 9 300x400 Tutorial: how to connect external HDD to Apple iPad

2. Open Terminal, on your Mac (/Applications/Utilities/Terminal.app). On Windows you can use Putty.

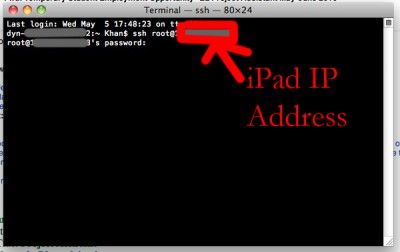
3. At the prompt, SSH into your iPad with the IP address you found in the “Settings” app (make sure OpenSSH is installed!), with the following:

ssh root@[iPad IP address]

Fig 10 400x252 Tutorial: how to connect external HDD to Apple iPad

For you first time users, the password for your root account will be “alpine”. NOTE: Please change your password ASAP. To do this, once you’ve logged in VIA Terminal, type the following into the command prompt:

passwd root

You will then be prompted for a new password. Please do the same for your “mobile” user as well, by doing the following:

passwd mobile

4. Now, type the following, in Terminal:

mkdir /Volumes
mkdir /Volumes/EXT
ln -s /Volumes/EXT /var/mobile/EXT
nano /var/stash/Applications.xxxxxx/iFile.app/Info.plist (“xxxxxx” is a series of numbers after “Applications”. If you type “/var/stash/Applications” and hit the “Tab” key, it will fill in the rest for you).

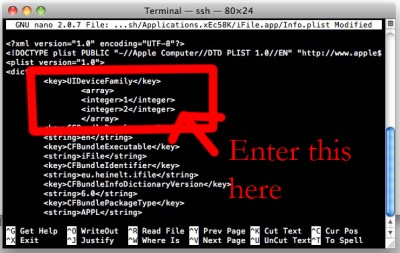
5. The nano text editor will now open. Please add the following lines below the first “<dict>”, in the document (this makes iFile look much better on the iPad):

Fig 13 400x253 Tutorial: how to connect external HDD to Apple iPad

<key>UIDeviceFamily</key>
<array>
<integer>1</integer>
<integer>2</integer>
</array>

6. Then hit “Ctrl+x”. Followed by “Y”, and then “Enter”. This will save the changes that you made.

7. Now, reboot your iPad. You will notice that your SSH connection will have closed, in Terminal. Re-open terminal, when the iPad reboots, and follow steps 1-3 (without reseting the passwords again).

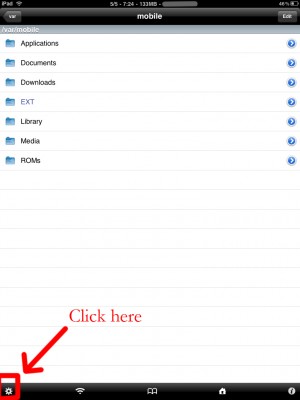
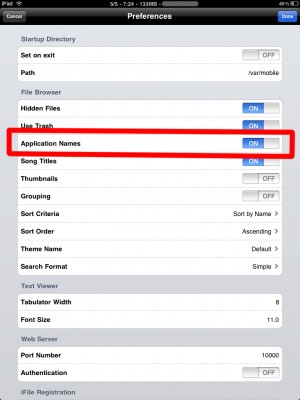
8. Open iFile, and go into the settings. It is recommended to have the settings set as shown below. The most important is enabling “Application Names”. Hit “Done”. Close out of iFile by hitting the Home button. Restart iFile.

Fig 15 300x400 Tutorial: how to connect external HDD to Apple iPad

FIG 16 300x400 Tutorial: how to connect external HDD to Apple iPad

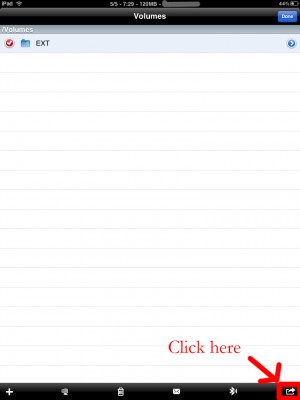
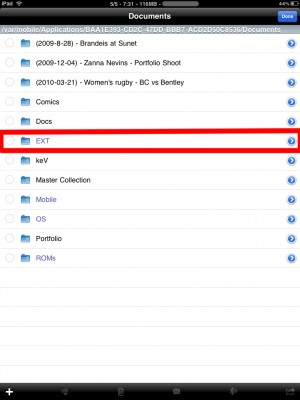
9. In iFile, navigate to “/Volumes/”. Then, select the “Edit” button, in the top right.

10. Check the circle next to the “EXT” folder you created in “Step 4″.

11. Click the “Box with an arrow”, in the bottom right. In the dialogue box that opens, select “Copy/Link”.

Fig 19 300x400 Tutorial: how to connect external HDD to Apple iPad

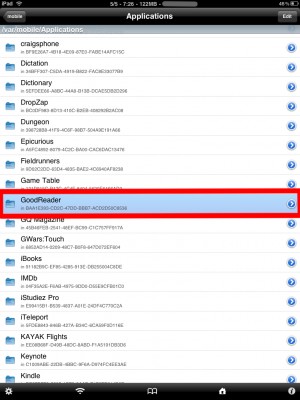
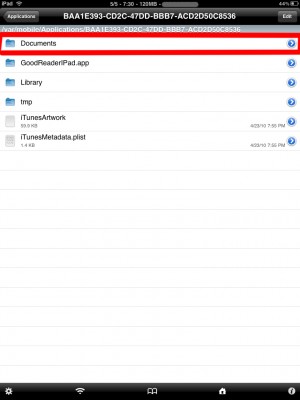
12. In iFile, Navigate to “var/mobile/Applications/”. You should now see the names of applications above the actual folder names. Navigate to the “GoodReader” folder, then the “Documents” folder.

Fig 20 300x400 Tutorial: how to connect external HDD to Apple iPad

Fig 21 300x400 Tutorial: how to connect external HDD to Apple iPad

13. Click the “Edit” button again. And then click the “Box with an arrow”, in the bottom right. Click the “Create Link” button. You should now see the “EXT” folder. Hit “Done” in the upper right.

Fig 22 300x400 Tutorial: how to connect external HDD to Apple iPad

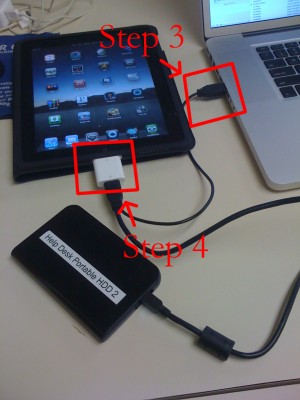
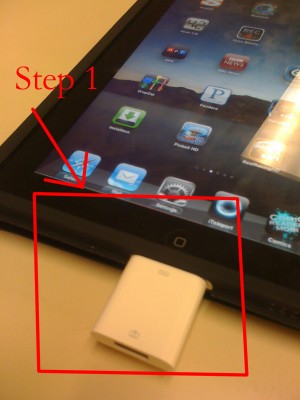
14. Now, connect your iPad Camera Connection Kit.

Fig 23 300x400 Tutorial: how to connect external HDD to Apple iPad

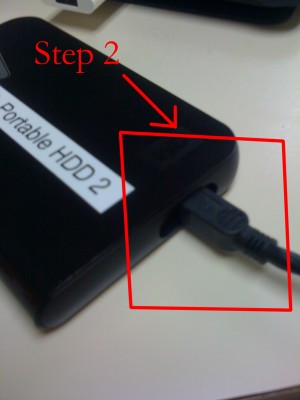
15. Take your hard drive and plug the secondary port into a power supply (in this case, Macbook Pro). Then, plug the main USB port into the iPad. You may see a message similar to “Insufficient power to mount this drive” error message on the iPad. With an external power supply, it should be much more convenient. NOTE: You MUST plug in the external power supply first, or else the iPad will not mount the drive.

Fig 24 300x400 Tutorial: how to connect external HDD to Apple iPad

IMG 0079 21 300x400 Tutorial: how to connect external HDD to Apple iPad

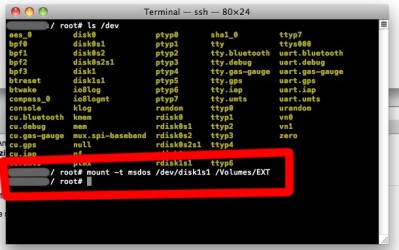
16. Now, lets go back to terminal. Type:

ls /dev

What you’re looking for here is the file “disk1s1″. If that does not show up, try steps 15-16 again. If you see “disk1s1″, proceed to step 17.

17. For a FAT32 formatted drive, type the following, into terminal:

Fig 26 399x250 Tutorial: how to connect external HDD to Apple iPad

mount -t msdos /dev/disk1s1 /Volumes/EXT

It will take a few seconds, and then return you to the command prompt. For an HFS drive, type the following:

mount -t HFS /dev/disk1s1 /Volumes/EXT

18. You are now good to go! You can now access the files in either iFile, or GoodReader. As an example of how to manipulate the files, watch the video below.

19. To unmount the drive, type the following, in Terminal:

umount /dev/disk1s1

20. That’s all!

Here is a video demonstration:

Many thanks to Max Sha!