Password | Jailbreak iPhone, iPod Touch, iPad Skip to content

Jailbreak iPhone, iPod Touch, iPad

новости про джейлбрейк iPhone, iPod Touch и iPad

Archive

Tag: password

pangu8 windows jailbreak 500x361 Step by step Tutorial: How to Untether Jailbreak iPhone, iPad and iPod Touch Using Pangu8 (Windows) [iOS 8.0 8.1]

This is step-by-step instructions on how to perform untethered jailbreak of iOS 8.0 – iOS 8.1 firmwares using Pangu8 for Windows.

This tutorial works for:

  • iPhone 4S, iPhone 5, iPhone 5C, iPhone 5S, iPhone 6, iPhone 6 Plus
  • iPod Touch 5G
  • iPad 2, iPad 3, iPad 4, iPad Air, iPad Air 2, iPad Mini, iPad Mini 2, iPad Mini 3

Supported firmwares: iOS 8.0 – iOS 8.1.

Read the rest of this entry »

ios8 jailbreak 500x273 Pangu released Untethered Jailbreak for iOS 8   iOS 8.1

The team behind the Pangu untethered jailbreak of iOS 7.1-7.1.2 has released a Pangu8 untethered jailbreak for iOS 8 – 8.1.

Currently a jailbreak utility is only available for Windows and at this time Cydia and Mobile Substrate are not working.

Here’s the translated details via reddit user zsm1703:

—–
PanGu iOS 8 Jailbreak Tool(pangu.io)
1. Preparations for jailbreak.
Backup before using pangu jailbreak tool. Although this tool is tested successfully on most devices, we still hope you backup your data to avoid data loss. Please turn off the screen password lock and close the “find my iPhone” feature in the iCloud settings before jailbreak.

2. the firmware upgraded via OTA may cause failure.
The firmware upgraded via OTA will have a lot of influence factors. If you have several failed attempts, Please try to download the latest firmware and restore your iOS devices. In addition, Pangu (iOS 8) tool now add a function to restore iOS devices and execute automatic activation, you can try click the jailbreak button after restoring, and Pangu will automatically activate your device and do jailbreak.

3. “Storage capacity is almost full.”?
This is because the jailbreak program will write important files into the system directory and cause alarm, it will not affect the result. When the Cydia be compatible, click on the Cydia will launch the directory moving process.

4. About afc2?
Because Apple made a lot of adjustments to the system, you cannot use afc2 plug-ins at present.

5. Do not delete “com.apple.mobile.softwareupdated.plist”
Do not delete “com.apple.mobile.softwareupdated.plist”, otherwise it will cause system failure.

6. Processing method of jailbreak failure
Please enable the Airplane mode and close Wifi and then try to jailbreak, or if not successful, please restart your devices and then try. If it still fails, please use the Pangu restore function and jailbreak again.
—–

iOS 8 jailbreak 1 491x400 Pangu released Untethered Jailbreak for iOS 8   iOS 8.1

Saurik has already indicated that he will work hard to get Cydia compatible as soon as possible.

So, windknown has contacted me, about a half hour ago, via e-mail. He has told me one of the issues that is keeping Substrate from working on the device, which will probably require me to build a little binary patch for dyld as part of the Substrate installation sequence. This was the worst possible day for me, as I’m traveling back to Santa Barbara today (I’m currently in Texas, having come here to give a talk at The Big Android BBQ), which means this will take me a little longer than I’d like, but clearly getting Cydia and Substrate working on iOS 8 is my highest priority. I thankfully think that I actually can start working a little on one of the Substrate issues using an iOS 7 “model” based on the information provided by windknown, which means I’ll lose less time to not having all of my devices with me. (I currently have no clue why Cydia itself is not functioning, but will find out later today when I can see it myself.)

Update:
The Pangu team has pulled the original download link, likely to address some bugs. We recommend you follow iClarified to find out when a safe version is available.

Update x2:
Pangu8 1.0.1 has been released resolving an issue that could cause the loss of your photos. You can download Pangu8 here.
Once its confirmed that the jailbreak is safe and Cydia and Mobile Substrate are working we will posted detailed instructions on how to jailbreak your device.

Update: iOS 8 compartible Cydia released.

pangu8 500x215 Pangu released Untethered Jailbreak for iOS 8   iOS 8.1

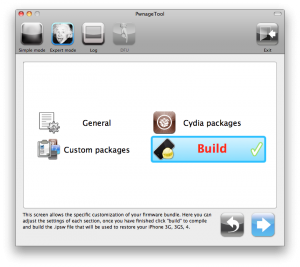
pwnagetool413 3gs 3 300x267 Step by step Tutorial: jailbreak iOS 4.2.1 on iPhone/iPod/iPad using PwnageTool 4.2 (Mac OS)

UPDate: save your iOS 4.2.1 SHSH blobs now!

UPDate 2: Attention! We’ve received info, that Apple stopped signing iOS 4.2 for devices for which iOS 4.3 is available. This means you will not be able to restore to 4.2.1 without saved SHSH keys.

Using this tutorial you will be able to jailbreak iOS 4.2.1 running on iPhone 3G, iPhone 3GS, iPhone 4, iPod Touch 3G, iPod Touch 4G and iPad. Pwnagetool will also preserve baseband version if you need carrier unlock. If you have updated the baseband to version 06.15, you can use this tutorial. This tutorial uses PwnageTool 4.2 for Mac OS X.

We are not developers of jailbreak utilities, so we cannot assure that everything will work just fine. However we tried this tutorial on several devices and succeeded.

We will use iPhone 4 in our jailbreak tutorial. The process is the same for all devices.

Step One
Make a folder called “Pwnage” on the desktop. Download a couple of things:

Read the rest >>>

MobileTerminal iPhone4 04 500x333 Step By Step Tutorial: How to install MobileTerminal on iPhone with iOS 4.x

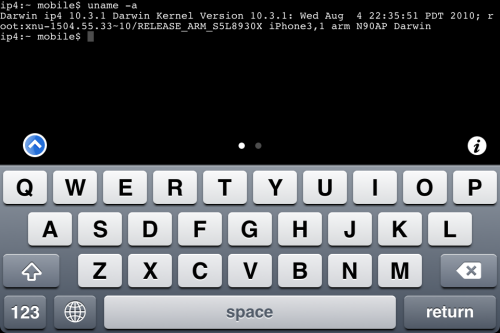
MobileTerminal is a terminal emulator application for the iPad and iPhone. The version of MobileTerminal that is available in Cydia doesn’t work with iPhone iOS 4.x. However there are beta versions that do work, but aren’t on Cydia because they are still in beta stages. This tutorial will show you step-by-step how to install MobileTerminal on iPhone with iOS 4.x (tutorial for iPad is here). If you have old version of MobileTerminal installed – uninstall it in Cydia (Search – MobileTerminal – Remove).

First of all you need to jailbreak your iPhone. If you have not done it already here is an easy tutorial: how to jailbreak iOS 4.0-4.1 on iPhone using Limera1n. After you successfully jailbreaked iPhone:

  1. Run Cydia by tapping on Cydia icon
  2. cydia icon Step By Step Tutorial: How to install MobileTerminal on iPhone with iOS 4.x

  3. The Cydia will start:

Read the rest of this entry

MobileTerminal iPad 05 500x375 Step By Step Tutorial: How to install MobileTerminal on Apple iPad

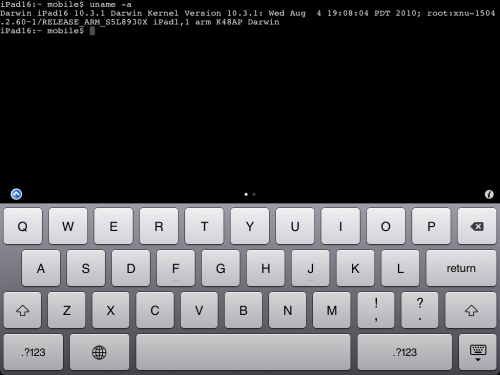
MobileTerminal is a terminal emulator application for the iPad and iPhone. The version of MobileTerminal that is available in Cydia doesn’t work with iPad iOS 3.2.2 and iPhone iOS 4.x. However there are beta versions that do work, but aren’t on Cydia because they are still in beta stages. This tutorial will show you step-by-step how to install MobileTerminal on iPad (tutorial for iPhone is here). If you have old version of MobileTerminal installed – uninstall it in Cydia (Search – MobileTerminal – Remove).

First of all you need to jailbreak your iPad. Here is an easy tutorial: how to jailbreak iPad with iOS 3.2.2 using Limera1n. After you successfully jailbreaked iPad:

  1. Run Cydia by tapping on Cydia icon
  2. cydia icon Step By Step Tutorial: How to install MobileTerminal on Apple iPad

  3. The Cydia will start:

Read the rest of this entry

These are instructions on how to jailbreak your iPhone using PwnageTool 4.1 for Mac OS X. If you need unlock and you have not updated to iOS 4 you will be able to preserve baseband and unlock iPhone using ultrasn0w.

This guide will work for iPhone 4, iPhone 3GS, iPhone 3G, iPod Touch 3G, iPod Touch 4G, iPad and AppleTV. Just use the right firmware and select the right device (step four).

Step One
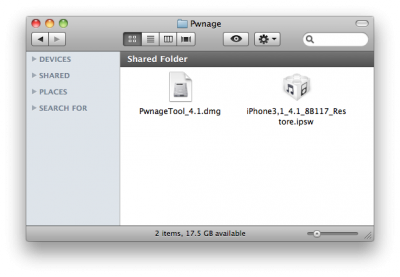
Make a folder called “Pwnage” on the desktop. Now you need to download there PwnageTool 4.1 from here and iOS 4.1 firmware from here.

When downloading the IPSW file, it is best to download it with Firefox since Safari often auto extracts it!

pwnagetool 41 1 400x277 Step by step Tutorial: how to jailbreak and unlock your iPhone using PwnageTool 4.1.2 (Mac)

Step Two
Double click to mount PwnageTool then drag the PwnageTool icon into the Pwnage folder.

Read the rest of this entry

itunes Prevent iTunes from Updating Jailbroken Devices

iTunes continues to serve iOS updates even if your Apple’s device was jailbroken. And if these updates are downloaded and installed occasionally, your device may be returned to  a non-jailbroken state.  Here the script, which prevents iTunes from automatically downloading updates:

#!/bin/bash
clear
echo “This script will chmod the download locations for Firmware Files, So iTunes can not download firmware.”
echo “AKA it will prevent iTunes from auto updating your device.”
echo “”
echo “”
echo “To restore firmware just hold down option and manually select the firmware file.”
echo “”
clear
echo “Made By: Wesley K”
echo “wesley@wesleyk.me”
echo “http://wesleyk.me”
echo “http://wesleyk.me/twitter
sleep 2
read -sn 1 -p “Press any key to continue…”
clear
echo “Now I need your password to continue”
echo “Killing iTunes now”
sudo -v
sudo killall -9 iTunes
sleep 2
clear

echo “Im going to make all the folder needed to future proof a few things”
echo “If errors occur here, No big deals.”
sudo mkdir ~/Library/iTunes/iPad Software Updates/
sudo mkdir ~/Library/iTunes/iPod Software Updates/
sudo mkdir ~/Library/iTunes/iPhone Software Updates/
sleep 2
clear

echo “I am going to dump all the current files in your update folders.”
echo “This will prevent any updates from downloaded firmware.”
sudo rm -rf ~/Library/iTunes/iPad Software Updates/*
sudo rm -rf ~/Library/iTunes/iPhone Software Updates/*
sudo rm -rf ~/Library/iTunes/iPod Software Updates/*
sleep 2
clear

echo “Now preventing iTunes from downloading new firmwares.”
sudo chmod 444 ~/Library/iTunes/iPad Software Updates
sudo chmod 444 ~/Library/iTunes/iPod Software Updates
sudo chmod 444 ~/Library/iTunes/iPhone Software Updates
sleep 2
clear

echo “Made By Wesley K”
echo “Give me credit if you use it”
echo “For safe measures I would run this script after iTunes updates, It shouldn’t affect it but I don’t know yet.”

To use it, just copy and paste the script into TextEdit: TextEdit → Format →  Plain Text. Save the file wherever you want as blockitunesupdates.sh. Open up a terminal window and type chmod +x filepath, where filepath is the path to the script. To start it, drag the script file into a Terminal window, push Enter, and follow the instructions.

If you update iTunes, OS X, or repair disk permissions with Disk Utility, you may need to perform the above described procedure again to make sure iTunes stays blocked. If you want to lock the script, replace the three 444s in the script with 555 and run it again.

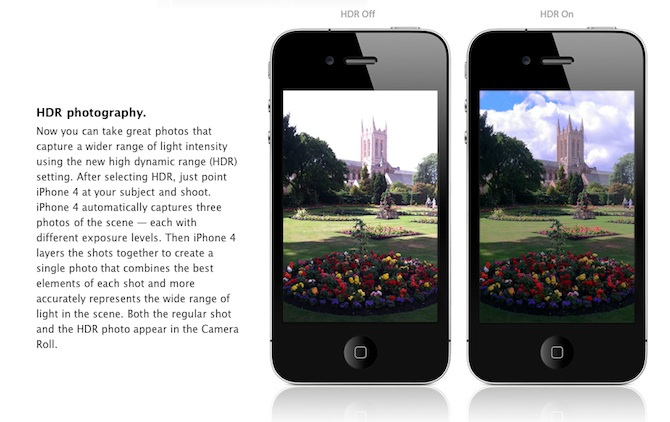
HDR iPhone 3 3GS Check out HDR photos on iPhone 3G or 3GS!

Are you looking forward to add a very popular HDR feature to your old iPhone? Do not worry! If you have a jailbroken (or ready to jailbreak) iPhone 3GS or 3G that runs on iOS 4.1, you can enable HDR photos. Here is a quick tutorial:

  • Make certain that you’ve installed OpenSSH via Cydia. When the application is installed, you’ll see SSH on your iPhone 3GS or 3G (it is recommended to use the «passwd» command to change your password from the standard «alpine»)
  • If you have an iPhone 3G, save the file, which is in / System/Library/CoreServices/SpringBoard.app/N82AP.plist
  • If you have an iPhone 3GS, save the file located at /System/Library/CoreServices/SpringBoard.app/N88AP.plist
  • Add a key «hdr-image-capture» with the “true” value
  • Save the file and use SSH to change a copy on your device with the modified version
  • Restart the SpringBoard or reboot your device. Now you’ve got access to the HDR settings in the application of your camera.

via

FaceTime feature gives users the possibility to make  voice calls. Apple restricted this feature to Wi-Fi only. Today it became possible to use it over 3G!

facetime 3g 235x400 iPhone 4 FaceTime video call over 3G is now possible

Setup Instructions:

  1. Jailbreak your iPhone 4 via www.jailbreakme.com.
  2. Download and upgrade to the latest Cydia package.
  3. Open Cydia, Go to Manage then Sources.
  4. Click Sources, Edit then add: http://apt.modmyi.com
  5. Search for “My3G” — download, and install it. It costs $2.79. My3G makes Apps believe that they are on WiFi instead of 3G.
  6. Go through the Rock setup process with a username and password. Open My3G and leave all settings on the default.
  7. FaceTime should now work over 3G! — Make sure to “Forget” the WiFi network you are on (via iOS settings) if you want to test it.

We haven’t seen any difference between the 3G FaceTime call and a WiFi FaceTime call. The quality is very good.

Here’s a video demo:

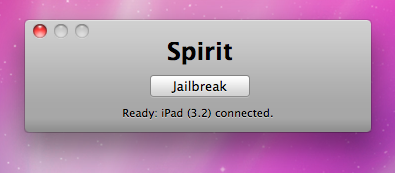
spirit jailbreak How To Recover Deleted Photos After Spirit Jailbreak

The first release of Spirit had a bug that accidently could delete all of your photos from the device that was jailbroken. If you have a backup which you made before jailbreaking your iPhone/iPod Touch/iPad, here is a quick guide how to recover deleted photos.

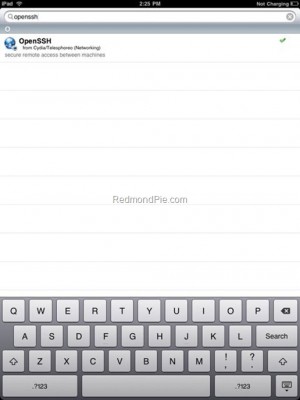
1. Open Cydia and search for “OpenSSH” and then install it. Reboot your device.

OpenSSHoniPad 300x400 How To Recover Deleted Photos After Spirit Jailbreak

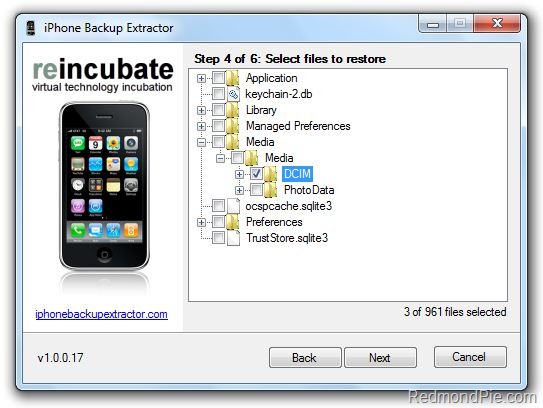
2. Download and then install iPhone Backup Extractor.

3. Run iPhone BackUp Extractor. Select your last backup (that was made before jailbreak)

4. Navigate to Media/Media and select DCIM folder. Click “Next” and program will save the files locally.

iPhoneBackupExtractor1 How To Recover Deleted Photos After Spirit Jailbreak

5. Download and then istall WinSCP for Windows or Cyberduck for Mac . Open it and enter the following data to login to your device.

WinSCP for Windows

  • Hostname: The IP address of your device. (Settings –> WiFi –> <Your Network Name>)
  • Protocol: SCP
  • User name: root
  • Password: alpine

WinSCP

Cyberduck for Mac OS X

  • Server: The IP address of your device. (Settings –> WiFi –> <Your Network Name>)
  • Protocol: SFTP
  • Username: root
  • Password: alpine

CyberDuck

6. Go to /User/Media directory and then copy over the DCIM folder.

7. Reboot your device.

After that you’ll have all your backuped photos back.

  • Page 1 of 2
  • 1
  • 2
  • >